 Office Solutions Pro
Add a flow button to each row of a SharePoint list
Add a button to each row of a SharePoint list that runs a flow for that item, with your own hover text, panel title, and button label, using JSON column formatting.
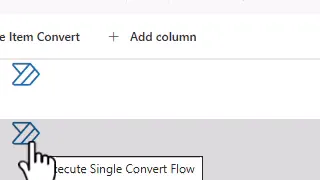
Running a flow from the Automate menu takes several clicks, and people need to know it exists. A button in the list row is easier to find. People select the icon, confirm in the panel, and the flow runs for that item.
The example button creates a document for a list item, but the same steps work for any flow that starts from a selected item.
Before you begin
You need:
- A SharePoint list, and permission to add and format its columns.
- A working flow that uses the SharePoint trigger For a selected item on that list.
- The JSON file,
single-item-flow-button.json, in single-item-flow-button.zip.
Check which environment holds your flow. Build it from the list with Integrate > Power Automate, or in your default environment. Microsoft notes that the SharePoint Automate menu lists only flows in the default environment for this trigger. A flow in a separate development or test environment is not a dependable choice for a list button, because the button’s JSON stores only the flow’s ID and has no environment setting.
1. Add a column for the button
-
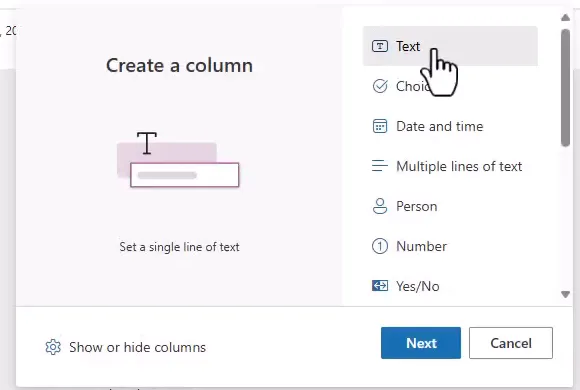
In the list, select Add column > Text, then Next.
-
Enter a name with no spaces, such as
SingleConvert, and select Save. A name without spaces gives you a simpler internal name if you later use the list in Power Apps. -
Select the column heading, then Column settings > Edit.
-
Change the name to what people should see, such as
Single Item Convert, and select Save.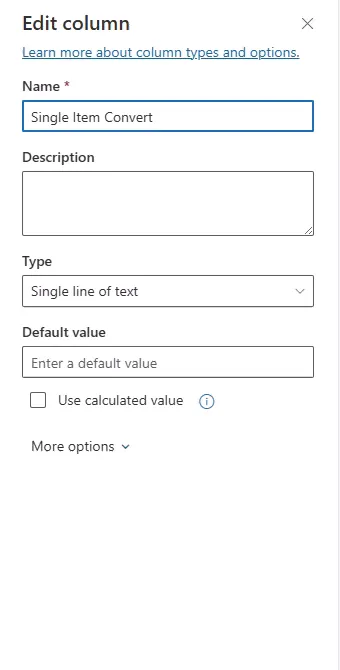
2. Paste the JSON
- Select the column heading, then Column settings > Format this column.
- Select Advanced mode.
- Select all the text in the box, then paste the contents of
single-item-flow-button.jsonfrom single-item-flow-button.zip.
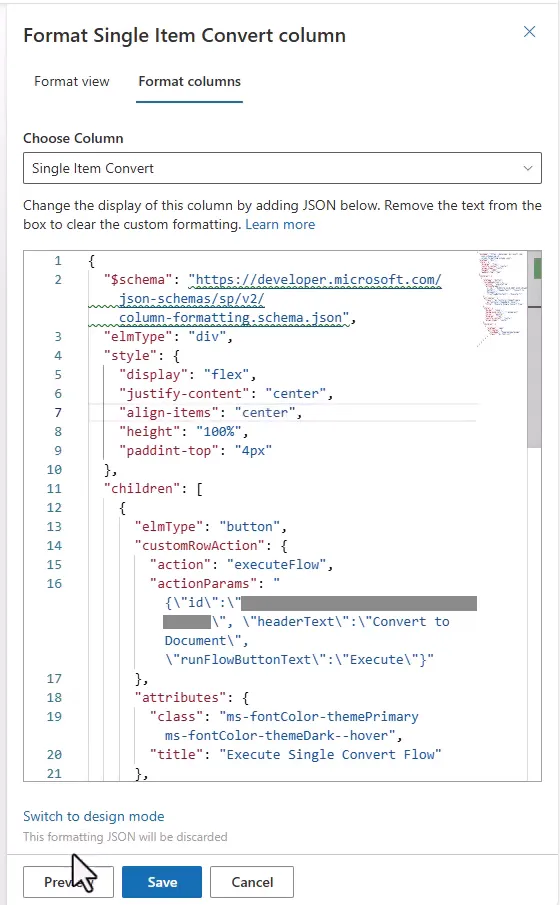
Copy the JSON from the file rather than from the picture. The picture shows different values.
3. Add your flow ID
- Open your flow in Power Automate.
- Copy its ID. Select Export > Get flow identifier, or copy the value after
/flows/in the browser’s address bar. The value before it is the environment ID, which you do not need. - In the JSON, replace
YOUR-FLOW-IDwith your ID.
4. Customize the button
Change the values below to suit your flow.
| JSON property | What it changes | Example value |
|---|---|---|
title | Text that appears when you hover over the button | Execute Single Convert Flow |
headerText | Title at the top of the panel | Convert to Document |
runFlowButtonText | Label on the run button in the panel | Create Document |
iconName | The icon | PowerAutomateLogo |
align-items in the outer style | Vertical position in the cell | flex-start for the top, center for the middle |
Rows in a list can grow tall when other columns hold long text, so flex-start keeps the button near the top of the cell. Select Preview to compare options.
For a text button, remove the span under children and add a txtContent value to the button. Microsoft’s samples show this pattern. You can use any Fluent UI icon name in iconName.
Be careful with small edits, because a missing comma or quote stops the JSON from working. A code editor such as Visual Studio Code highlights those problems.
5. Save and test
-
Select Save and close the pane. Every row now has the icon.

-
Hover over the icon and confirm your hover text.
-
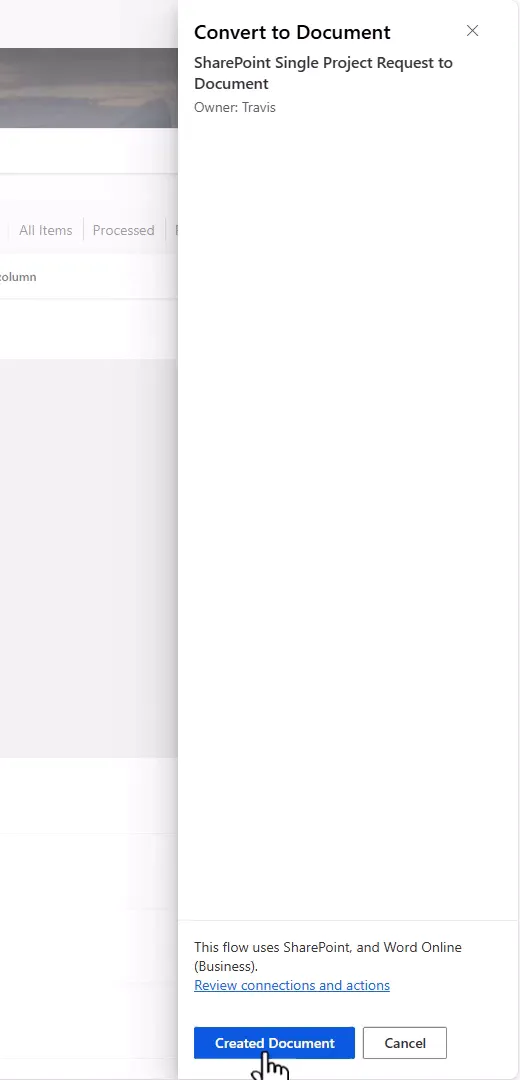
Select the icon. The panel opens with your title, and lists the connectors the flow uses.
-
Select the run button in the panel.
-
Check the flow’s result. In the example, documents appear in the library after a short wait.
Find more button templates
The JSON here started from a community sample, executeFlow.json, in the PnP List Formatting repository, under column-samples/generic-rowactions. That folder has other row action samples. This version adds a wrapper that positions the button in the cell. The sample is MIT licensed, so the download includes its license in LICENSE.txt.
When to use a different approach
- One item at a time: this button is the right tool.
- Many items at once: a button in every row is confusing for this. Use a Batch column with a single button on a page. The separate article on running a flow on multiple items from a Power App button covers that design.
Share the button with others
Everyone who uses the button needs permission to run the flow. Add people under Manage run-only users on the flow’s details page. On the same page, choose for each connection whether the flow uses your connection or one the run-only user provides. With your connection, the flow acts with your access for everyone who runs it. Users must have Edit permissions on the list to run flows. If your flow uses premium connectors, such as Word Online (Business), every user who runs it needs a Power Automate Premium license, or the flow needs a Process license.
Troubleshooting
| Symptom | Likely cause | What to do |
|---|---|---|
| The pane reports a JSON error | A comma, quote, or bracket is wrong | Paste the original file again, then repeat your edits |
| The button does nothing, or the panel shows an error | The ID is wrong, or the flow is in another environment | Copy the ID again. Rebuild the flow from the list’s Integrate menu if needed |
| The panel shows the wrong flow | An old ID remains in the JSON | Replace the ID, then save |
| The button text has a typo | The value needs editing | Reopen Format this column, change the text, and save. The change appears right away |
| The button is not where you want it | Row height changes with other columns | Adjust align-items and justify-content, and preview |
| Someone cannot run the flow | They lack run-only access, list permission, or a license | Check the items under Share the button with others |
Companion video
Video: Add a Power Automate Button to SharePoint List: Convert to PDF/Word (Step-by-Step Tutorial)
If the player is blocked on your network, open the video on YouTube.
Need help applying this to your own setup? Read about consulting.