 Office Solutions Pro
Copy a SharePoint page between sites with Power Automate
Use a three-step flow to copy a page from one SharePoint site to another, including bringing full-width Hero, Image, and Countdown sections from a communication site to a team site.
The Move to option isn’t currently available on the Site Pages library, so a page can’t simply be moved to another site. A short flow can copy it instead. It copies the page file from one site’s Site Pages library to another’s.
This can also help with a common design limit. Microsoft documents full-width sections as available only on communication sites. In the example team site, the full-width section offers only Banner, while the communication site offers Image, Hero, Banner, and Countdown Timer. Copying a finished page brings those sections along.
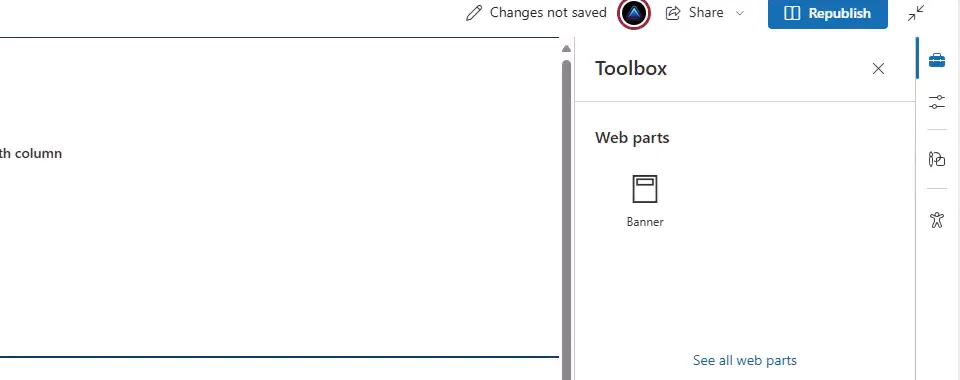
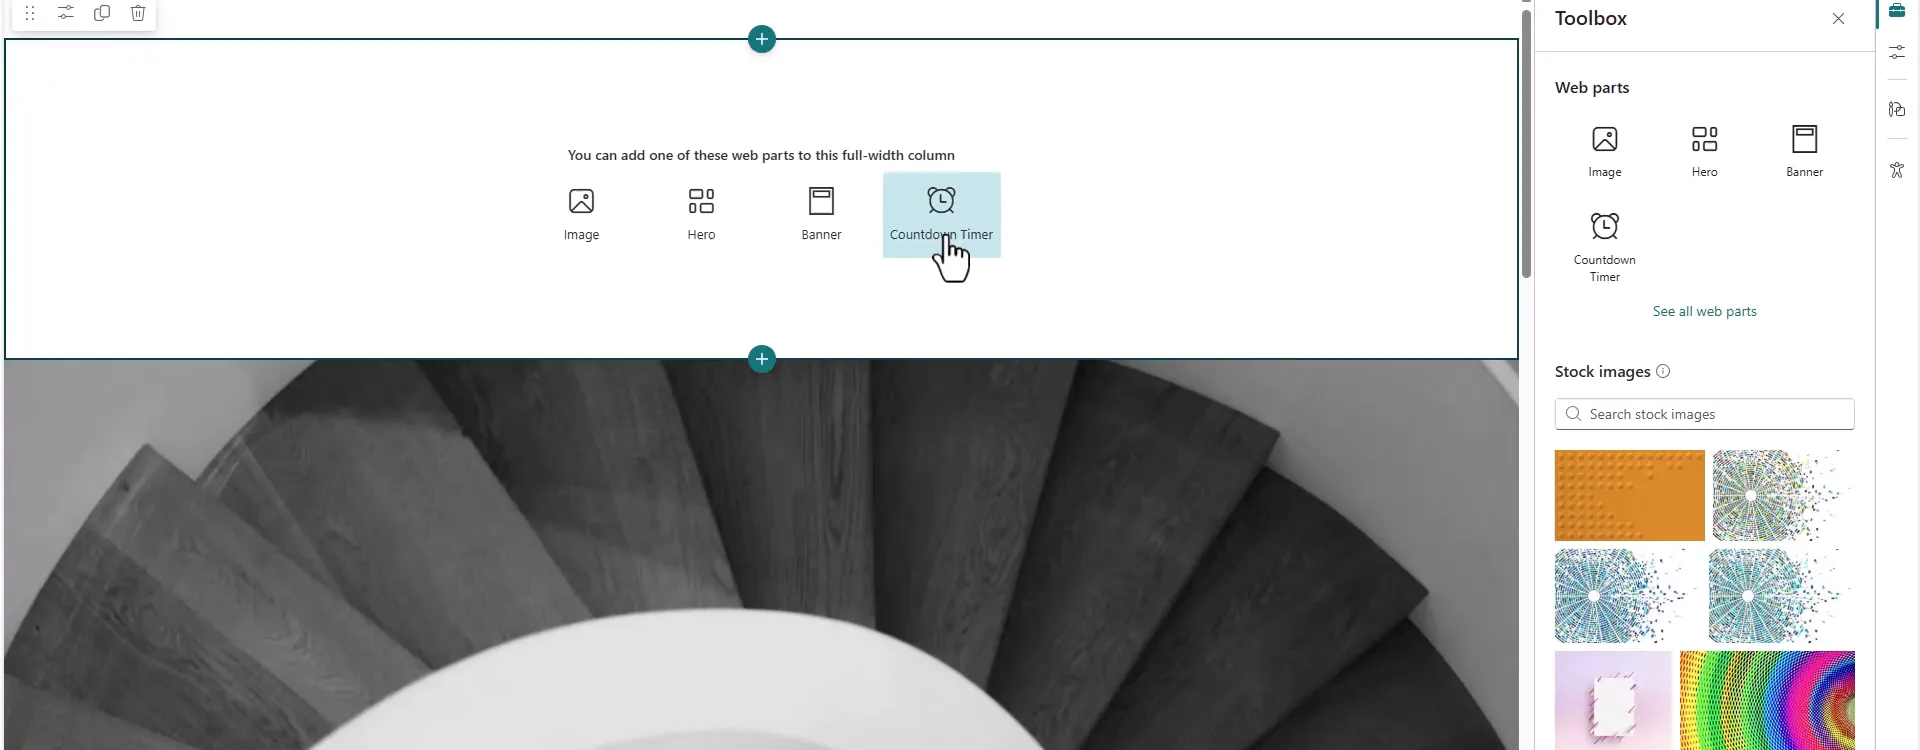
Treat the full-width result as a workaround. Microsoft does not document it, so a page carried over this way may not behave like a normal team site page, now or after future updates. Test any changes you plan to make to the copied page.
Before you begin
You need:
- A source page. To reuse full-width sections, create it on a communication site.
- A destination site.
- Access to both sites, with permission to add pages to the destination.
- Access to Power Automate. This flow uses only the SharePoint connector, which is Standard in Power Automate.
Build the flow in your default environment, because the Automate menu only lists flows from there for this trigger.
1. Build and publish the source page
- On the source site, create a page and add the sections you want.
- To reuse a mix of sections, add each one in turn. The example page,
Template-Full-Width, has an Image, a Hero, a Banner, and a Countdown Timer. - Publish the page.
2. Copy the Site Pages list ID
Site Pages is not offered in the flow’s List Name dropdown, so you need to enter its ID. Microsoft supports flows for lists only on generic lists and libraries, so this use of Site Pages isn’t covered by Microsoft’s documentation. Test the flow on a copy of a page before you rely on it.
- On the source site, open Site contents > Site Pages.
- Select Settings > Library settings > More library settings.
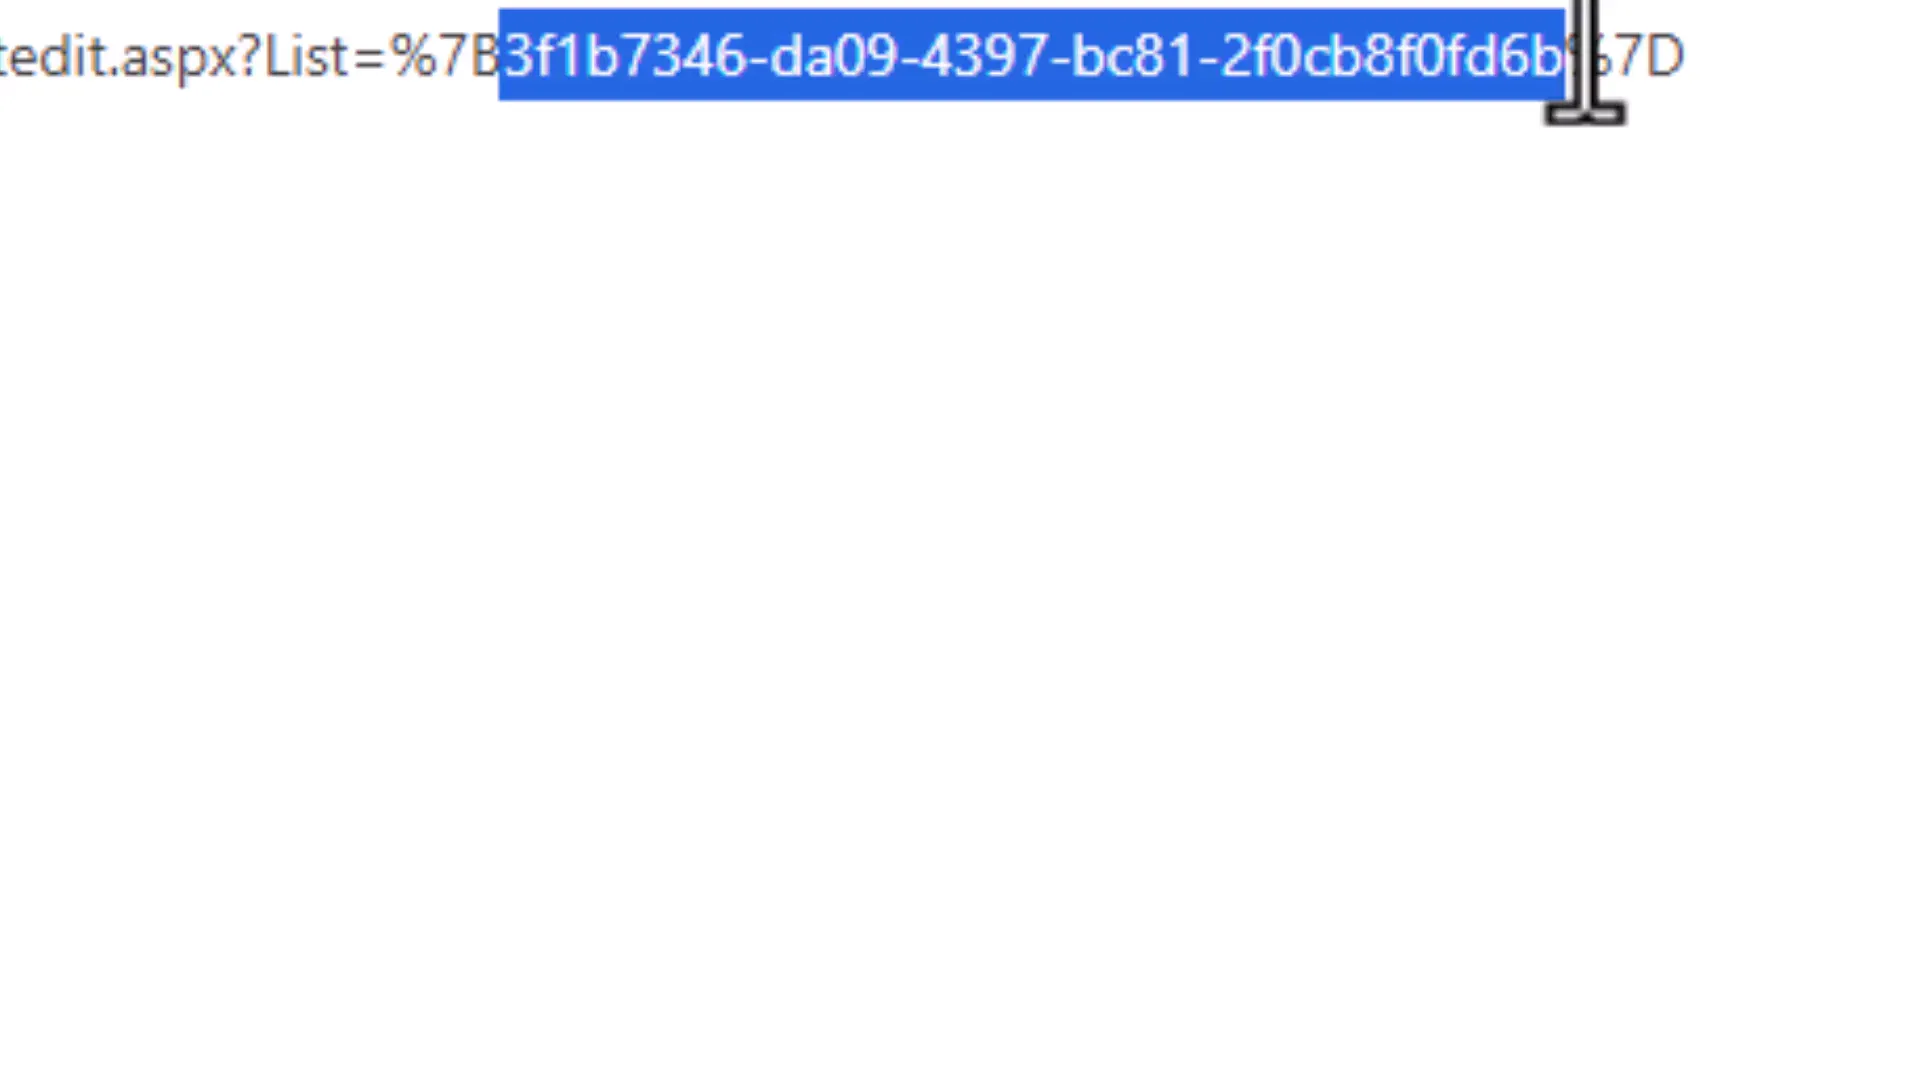
- In the address bar, find
List=%7B, which is followed by the ID and ends at%7D. - Copy only the part between them.
3. Create the flow
- From Site Pages, select Automate > Power Automate > See your flows, then create a new flow. You can also start from Power Automate.
- Add the SharePoint trigger For a selected item.
- In Site Address, select the source site.
- In List Name, select Enter custom value, and paste the list ID.
4. Get the page’s details
- Add the SharePoint action Get file properties.
- Select the source site.
- In Library Name, select Enter custom value, and paste the same list ID.
- Set Id to the ID from the trigger.
5. Copy the file
- Add the SharePoint action Copy file. If you also see Copy file (deprecated), do not use that one. The current action works in a similar way to the Copy to command in SharePoint libraries.
- Set the fields as follows:
| Field | Value |
|---|---|
| Current Site Address | The source site |
| File to Copy | Identifier from Get file properties |
| Destination Site Address | The destination site |
| Destination Folder | /SitePages |
| If another file is already there | Replace, Copy with a new name, or Fail this action |
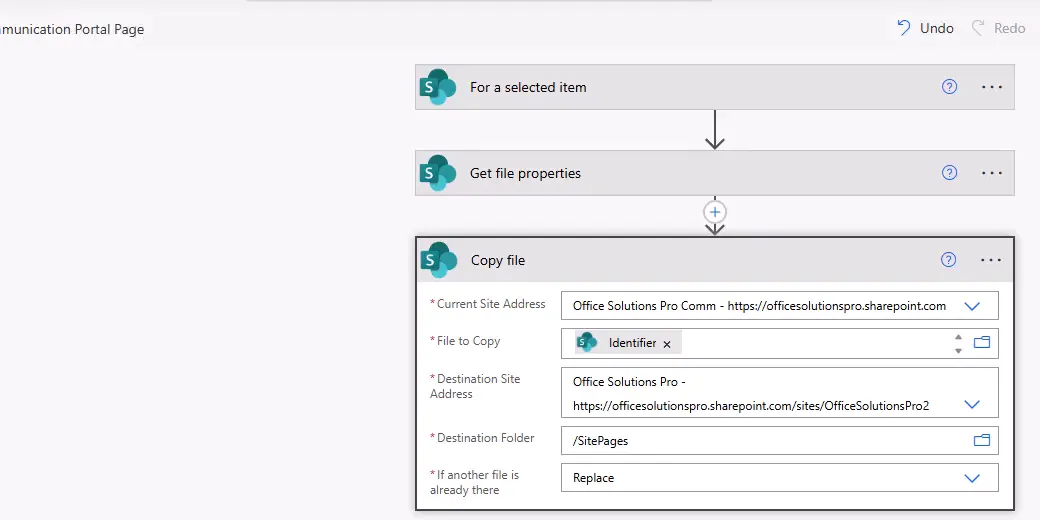
Use Replace with care. It overwrites a destination page with the same file name, including any edits made there. Copy with a new name is safer on a live site.
- Name the flow, such as
Copy Communication Portal Page, and select Save.
6. Run the flow
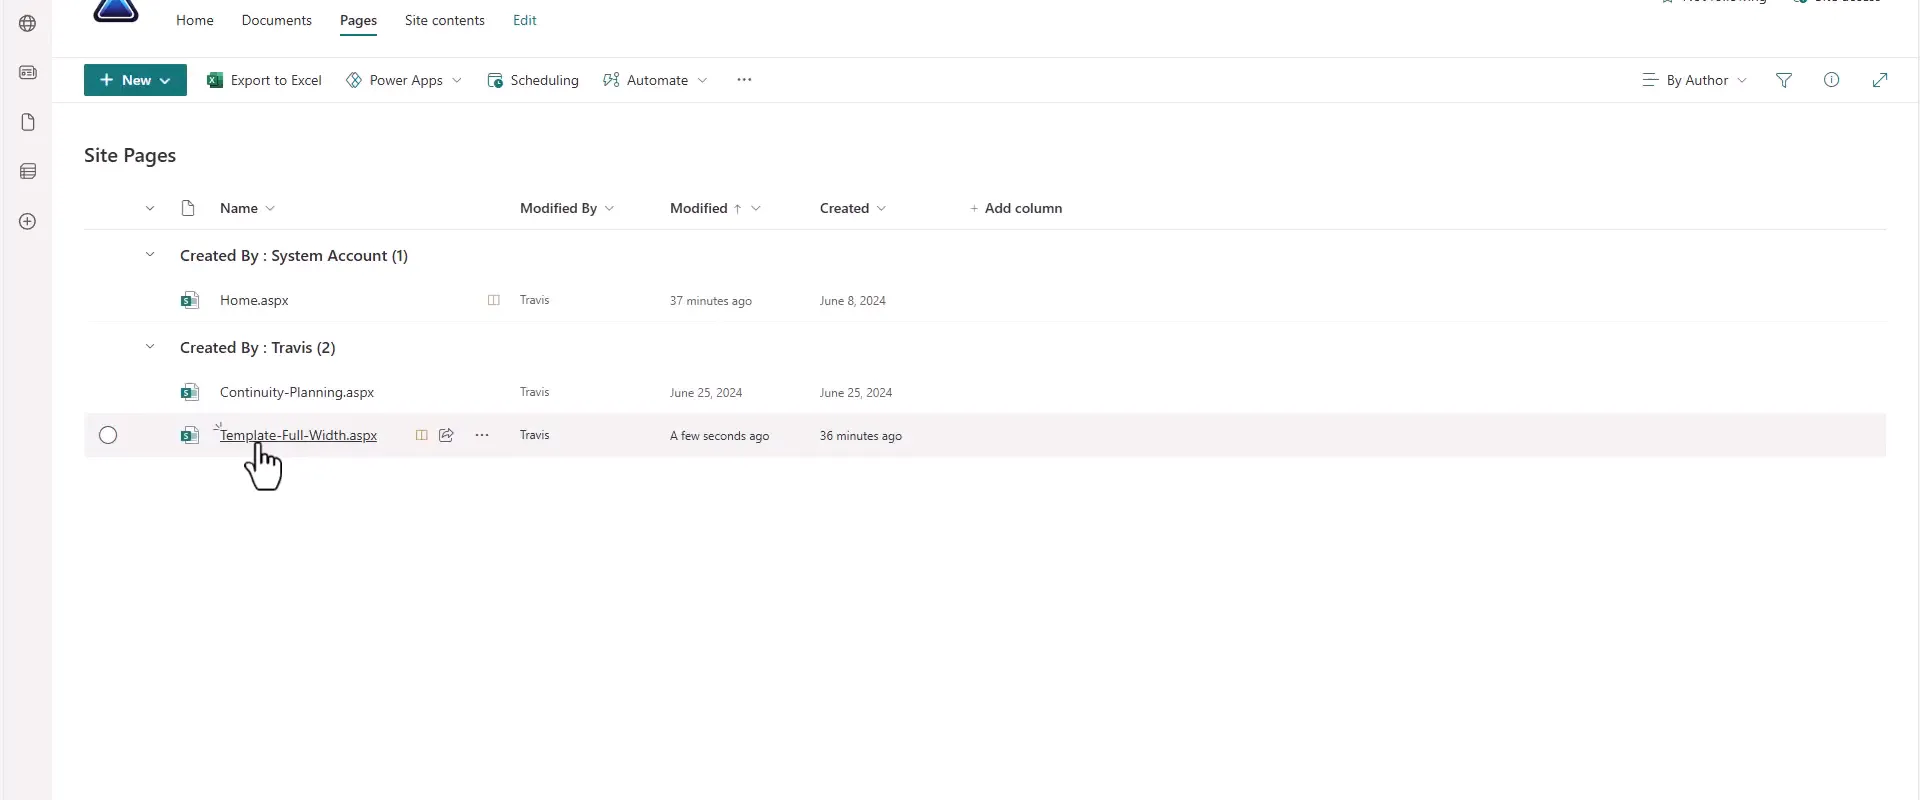
-
In the source site’s Site Pages library, select the page.
-
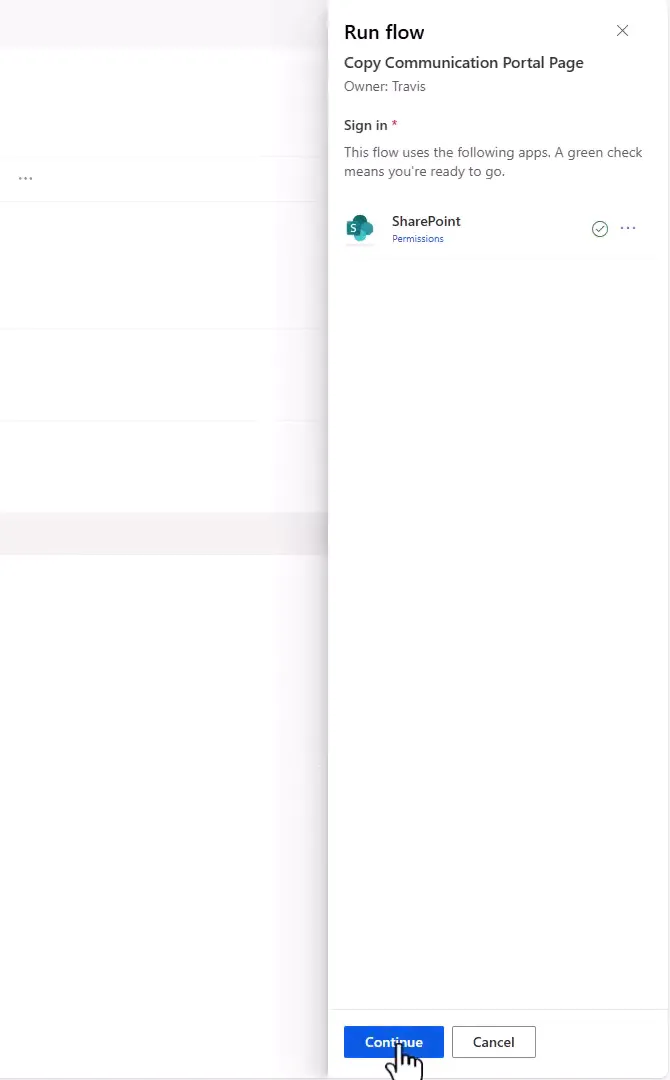
Select Automate, then your flow.
-
Confirm the connection, select Continue, then Run flow.
7. Check the copied page
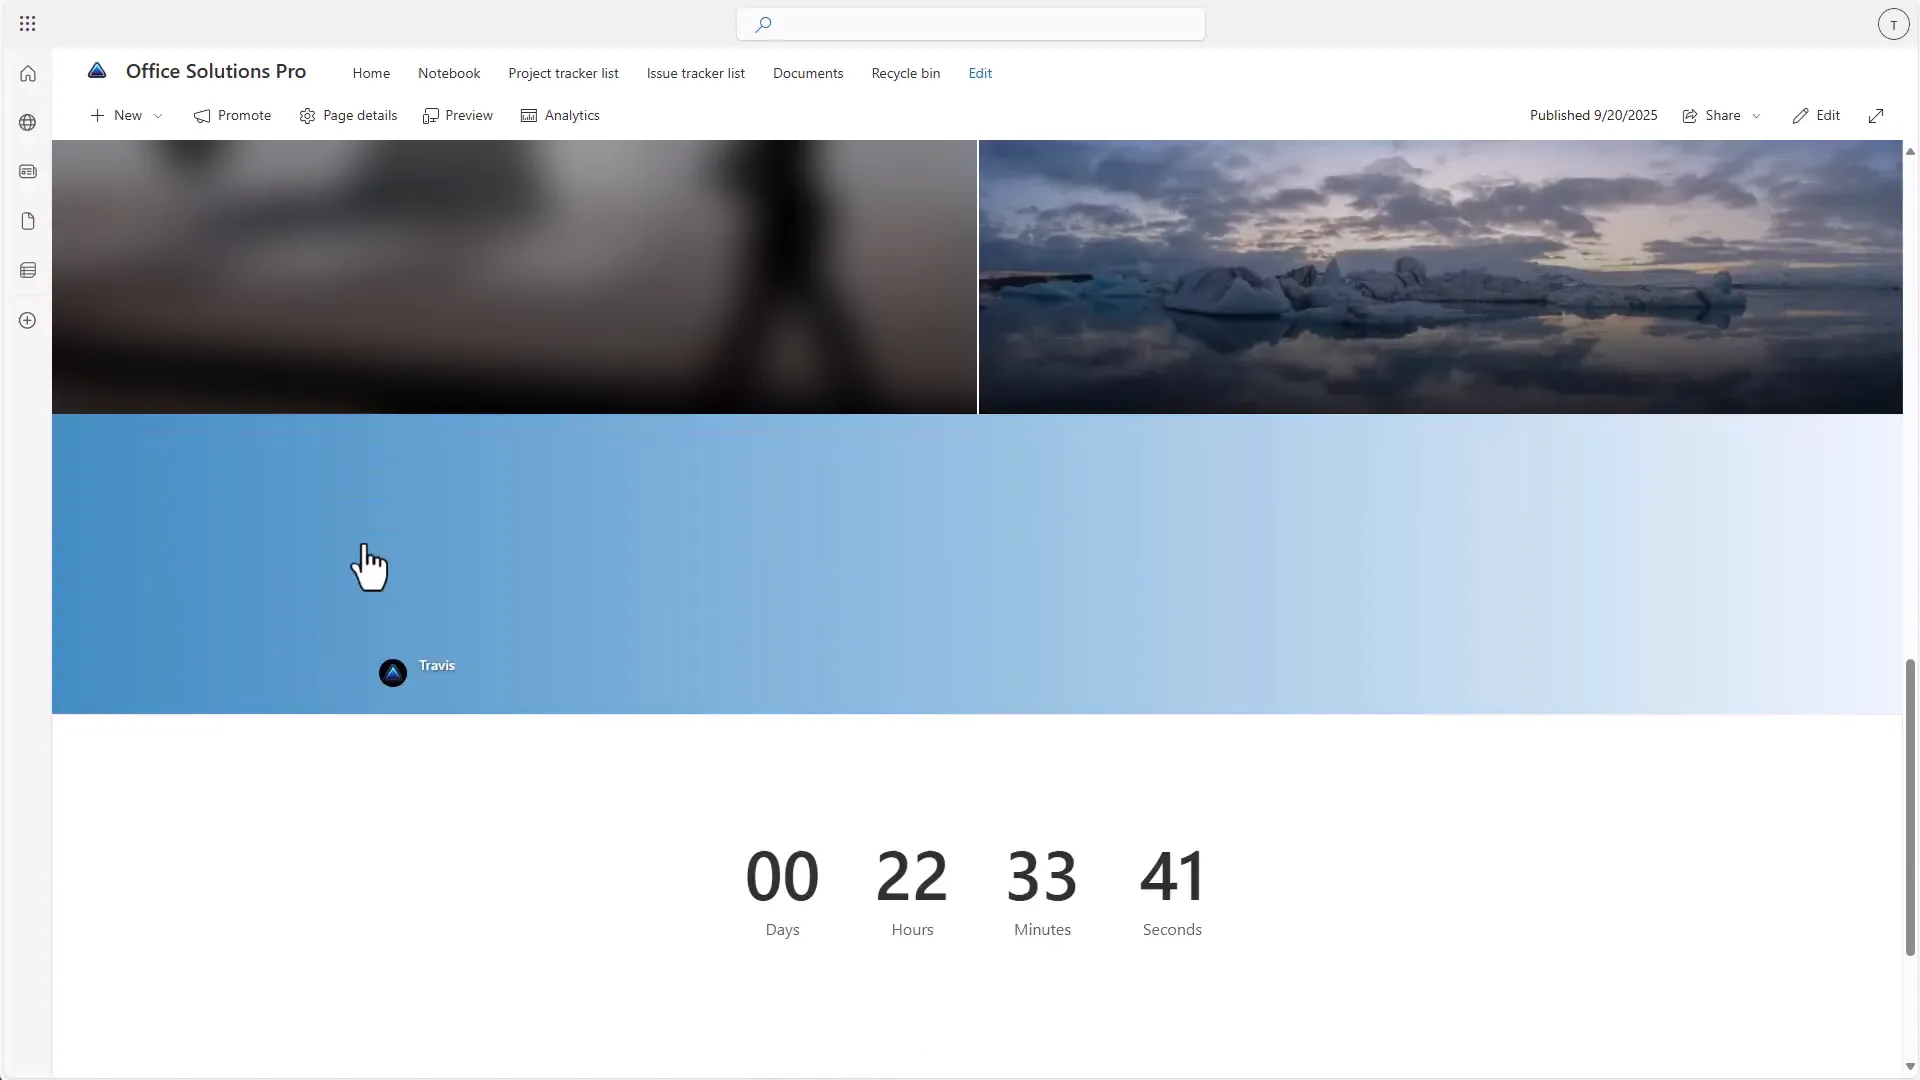
- On the destination site, open Site contents > Site Pages, and open the page.
- Scroll through and check each section.
- Check content that depends on the source site, such as images, links, and web parts connected to lists. These may still point to the source, so test with an account that only has access to the destination.
- If the destination site has content approval or scheduling turned on, check the page’s published state before you share it.
Reuse the page
You cannot add these full-width sections to other team site pages in the normal editor, so plan ahead:
- Keep the copied page as a starting point. Duplicate it for each new page, then edit the content.
- Add the sections you may want before you copy. It is easier to remove a section than to bring one in later.
You can use the same flow for any page, such as sharing a standard page across sites or copying from a team site to a communication site. Change the addresses and the list ID to match the source.
Troubleshooting
| Symptom | Likely cause | What to do |
|---|---|---|
| Site Pages is missing from List Name | It isn’t offered in the dropdown | Use Enter custom value with the list ID |
| The list ID doesn’t work | The %7B or %7D was copied too | Paste only the value between them |
| The flow is not in the Automate menu | You’re on another library, the flow is in another environment, or more than one page is selected | Open the source Site Pages library, select one page, and build in the default environment |
| The action fails with a file conflict | Fail this action is selected and the name exists | Choose another option or rename the page |
| The page opens but images are missing | The images are stored on the source site and the viewer has no access | Upload the images to the destination site and reselect them |
| A full-width section can’t be edited as expected | The destination site doesn’t normally offer that section | Make the change on the source page and copy it again |
| The page was overwritten | Replace was selected | Look for the earlier version in the page’s version history. If it isn’t there, the edits are lost. Next time, use Copy with a new name |
Companion video
Video: Copy SharePoint Pages Between Portals with Power Automate | Modern Site-Full-Width Hero, Img, etc.!!
If the player is blocked on your network, open the video on YouTube.
Need help applying this to your own setup? Read about consulting.