 Office Solutions Pro
Customize a SharePoint list form without Power Apps or JSON
Organize list form fields, show questions conditionally, and add color to choices and rows, without writing JSON.
On this page
- Overview
- Before you begin
- 1. Create the Office Support Request list
- 2. Add the request columns
- 3. Put the fields in a useful order
- 4. Show Justification only for High priority
- 5. Show System for Software or Access
- 6. Show Resolution only when Status is Completed
- 7. Test the visibility changes
- 8. Give Priority and Status useful colors
- 9. Highlight the whole row for High priority
You can make a standard SharePoint list form easier to complete using its built-in field controls. This example starts with a blank list and shows System only for relevant categories, Justification only for High priority, and Resolution only for Completed requests. It also makes Priority and Status easier to spot in the list view.
No Power Apps form or JSON formatter is needed. You will enter three short formulas in Edit conditional formula.
Before you begin
Use a SharePoint Online site and the modern list experience. You need permission to create the list and manage its columns and views. Microsoft’s Manage Lists permission covers list/column creation, and view formatting is available to people who can create and manage views. Microsoft: permission levels, Microsoft: view formatting.
This tutorial uses the standard list item form opened by New. It does not build the separate form experience available through the list toolbar’s Forms command.
1. Create the Office Support Request list
Open the site’s Site contents, then choose New → List. Choose the blank List option under Create from blank, enter Office Support Request, and select Create. This example clears Show list in site navigation as a preference; leave it checked if the list belongs in your navigation.
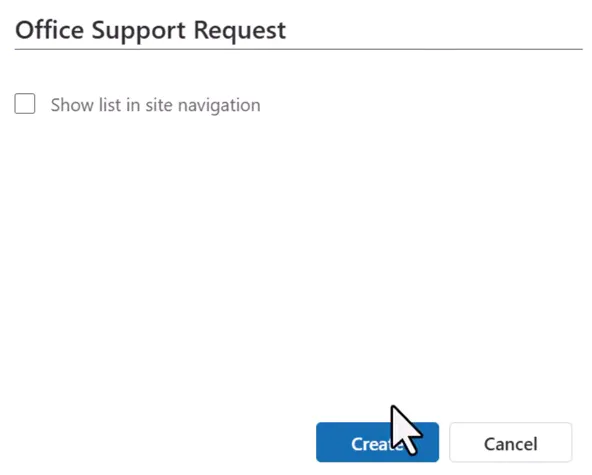
The blank-list tile’s appearance can differ during visual updates. Microsoft: create a list.
In the new list, open the Title column menu and choose Column settings → Rename. Rename it to Request and select Save. This gives the form a request-specific label.
2. Add the request columns
Select Add column at the end of the heading row, choose a type, and select Next. Enter the name and options, then select Save. Repeat for the nine additional columns below, in the order listed. Microsoft: create a column.
| New column | Type | Values or options |
|---|---|---|
| Category | Choice | Equipment, Software, Access, Facilities, Other; no default |
| Details | Multiple lines of text | Request description |
| Priority | Choice | Low, Normal, High; default Normal |
| Justification | Multiple lines of text, or Single line of text if you plan to require it with a validation rule (see Justification and validation before step 3) | Explanation for a High-priority request |
| System | Single line of text | Description: System/application involved |
| Status | Choice | New, In Progress, Waiting, Completed; default New |
| Resolution | Multiple lines of text | How the request was resolved |
| Assigned To | Person or Group | Turn Show profile photos on; group selection is left off |
| Need By Date | Date and time | Include Time off; turn Friendly format on |
Use single-selection Choice columns for Category, Priority, and Status. The formulas below compare one selected value at a time.
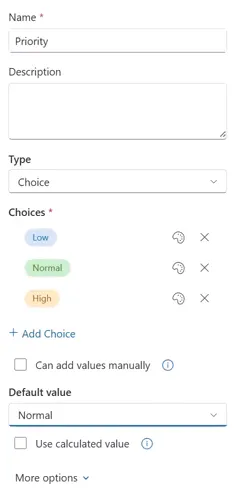
Defaulting Priority to Normal means the requester changes it explicitly when choosing Low or High.
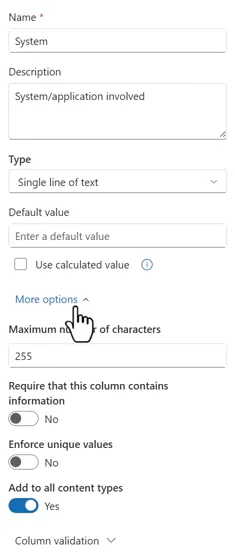
The System description becomes helper text below the field on the form. Add descriptions to other columns when users need guidance.
A Single line of text column is limited to 255 characters. More options can lower that limit, but cannot extend this type beyond it. If you need longer text, choose a suitable Multiple lines of text column instead. Microsoft: column types.
This tutorial doesn’t make any of these columns required, and it doesn’t add a rule that requires a justification when High is selected. Keep the new conditional fields optional. The Edit columns in the form pane states that required columns can’t be hidden, so don’t turn on Require that this column contains information for a field you want a formula to hide. To require a value only in certain cases, use a list validation rule, which checks the item when it’s saved.
Justification and validation: List validation can’t reference a Multiple lines of text column, so a rule that requires Justification for High priority needs Justification to be a Single line of text column, which is limited to 255 characters. Customize a SharePoint list form with JSON adds that rule, so if you plan to follow it, choose that type for Justification now. Microsoft Q&A: validation and multiple lines of text.
Decide before you create the column. Changing an existing column’s type can corrupt its data, and whether you can change it depends on what’s stored there. Microsoft says a Single line of text column can become Multiple lines of text without losing data, but it doesn’t describe the opposite change. Microsoft: column types.
3. Put the fields in a useful order
In the list view, drag the System heading after Category and Need By Date after Justification. The order is now:
Request → Category → System → Details → Priority → Justification → Need By Date → Status → Resolution → Assigned To
Select New to inspect the item form. Expand the form-edit icon at the top right and select Edit columns. The Edit columns in the form pane lists the fields in this order.
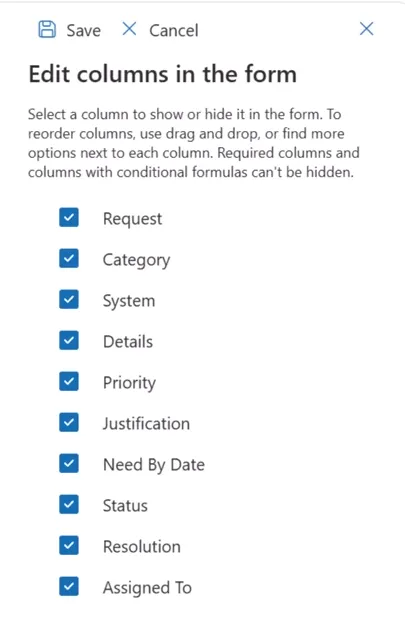
The form has its own order controls. If it does not match the list view, drag fields in this pane, or use the field’s ellipsis menu and Move Up/Move Down. Save the form configuration. Microsoft: show, hide, and rearrange form columns.
The checkboxes control general visibility. For the three rules below, use each target field’s ellipsis menu and Edit conditional formula. Leave the controlling Category, Priority, and Status fields available to the user.
4. Show Justification only for High priority
Reopen Edit columns from the form-edit menu if you closed the pane. In Edit columns in the form, open the menu next to Justification, select Edit conditional formula, and enter:
=if([$Priority] == 'High', 'true', 'false')Select Save in the formula dialog.
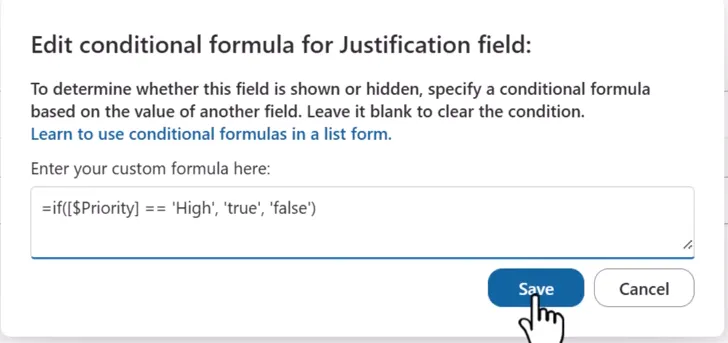
With the default Priority of Normal, Justification disappears from the form. Choosing High will reveal it. This changes visibility; it does not make the field mandatory.
5. Show System for Software or Access
Open System → Edit conditional formula and enter:
=if([$Category] == 'Software' || [$Category] == 'Access', 'true', 'false')Select Save. The || operator means OR, so either Software or Access shows System. Equipment, Facilities, Other, and an empty category do not satisfy this condition.
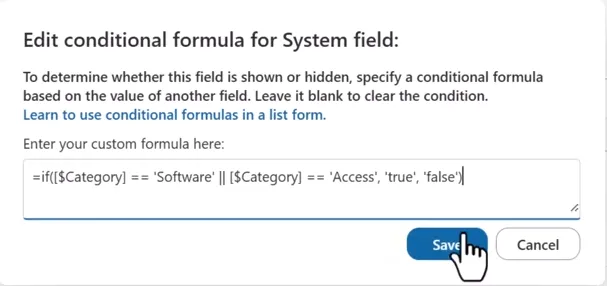
Use the exact choice strings configured in your list. References such as [$Category] use the column’s internal name, which doesn’t change when a column is renamed. The column you renamed to Request, for example, is still [$Title]. To find an internal name, open List settings, select the column under Columns, and read the value after Field= in the page address. If the address shows %5F, read it as an underscore. A returned 'true' shows the target field; 'false' hides it. Formulas can’t use Choice, Person or Group, or Lookup columns that allow multiple selections, time calculations in Date and Time columns, or Currency, Location, Calculated, or Managed Metadata columns. Microsoft: conditional form formulas.
6. Show Resolution only when Status is Completed
Open Resolution → Edit conditional formula and enter:
=if([$Status] == 'Completed', 'true', 'false')Select Save in the dialog, then select Save at the top of the Edit columns in the form pane to finish the configuration.
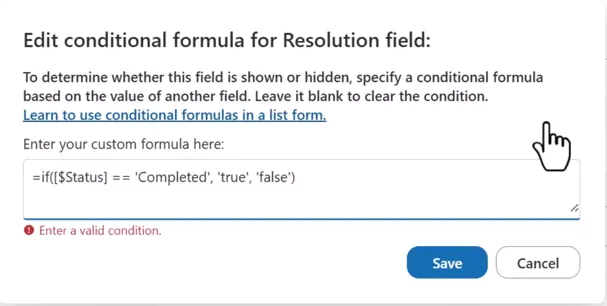
If you save an incomplete version of this formula, you’ll see Enter a valid condition. If the message stays on screen after you correct the formula, as it does here, the next Save accepts it. Use the complete formula above, including its final quote and closing parenthesis.
These formulas do not delete hidden values. A value already saved in a hidden field stays on the item and still appears in any view that includes that column. The formulas guide what users see on this form, rather than changing access permissions or adding save validation, and they apply only to the form, not to editing in grid view. Microsoft: show or hide form columns.
7. Test the visibility changes
After saving the form configuration, change the selections in the open New item form:
| Selection | Expected field behavior |
|---|---|
| Category = Software or Access | System appears |
| Category = Equipment | System disappears |
| Priority = High | Justification appears |
| Priority = Normal | Justification disappears |
| Status = Completed | Resolution appears |
| Status = New | Resolution disappears |
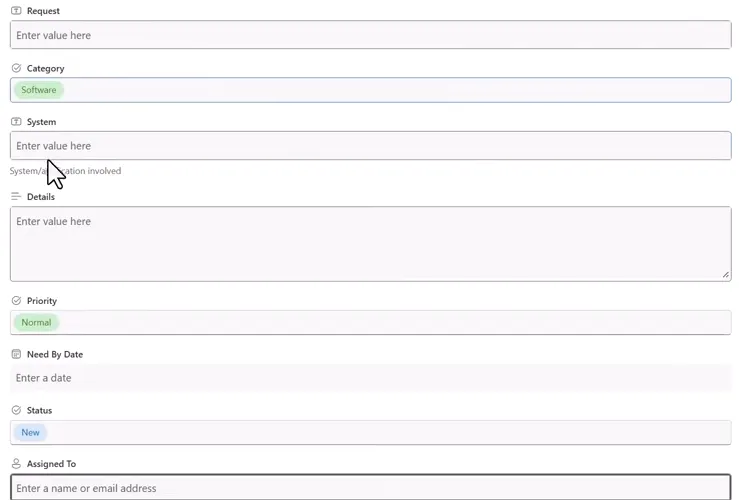
Software reveals System. Access does the same.
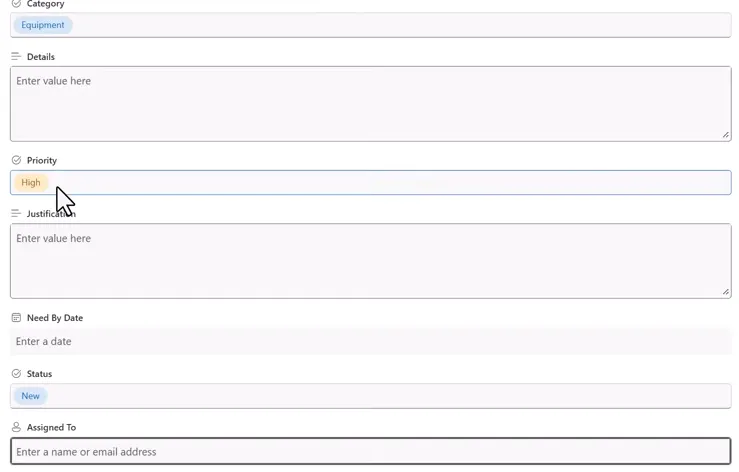
If you chose Single line of text, Justification is a one-line box here.
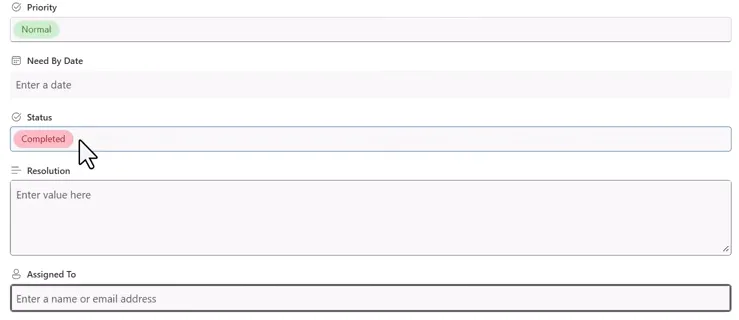
When you finish testing these transitions, select Cancel. This discards the empty test item and keeps the form configuration. For your own list, also check a reopened existing item and confirm its stored values behave as intended. Check too whether text typed into a field is saved if another selection hides that field before Save.
8. Give Priority and Status useful colors
For Priority, open Priority → Column settings → Edit. Use the palette icon beside each choice. The finished example uses an understated Low label, an amber Normal label, and a red High label. Select Save after choosing the colors.
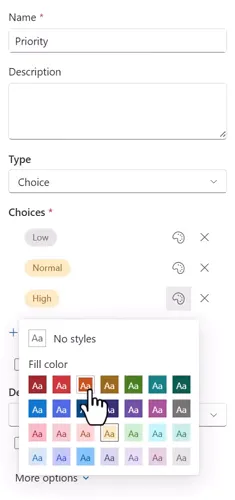
This image shows the palette while the colors are being changed. The finished red High pill is visible in the final list screenshot.
For Status, use the other route:
- Open Status → Column settings → Format this column.
- Under Choice pills, select Edit styles.
- Select the edit icon beside each value and choose its style.
- Leave the empty-value and other-value styles as appropriate, then select Save.
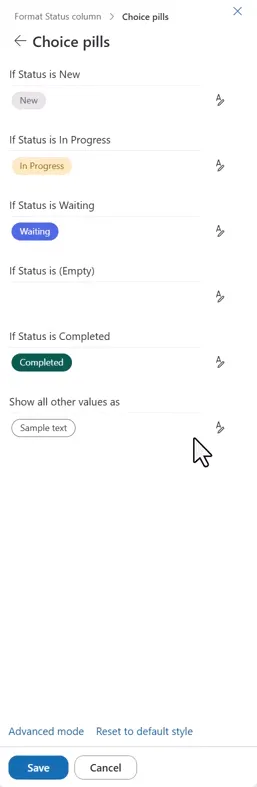
The sample ends with New in light gray, In Progress in amber, Waiting in blue, and Completed in dark green. These are presentation choices, not status automation. Microsoft documents Choice formatting in modern lists and this pill-editing sequence for Lists in Teams; the screenshots show the same labels in SharePoint. Microsoft: column formatting, Microsoft: Choice pill styles.
9. Highlight the whole row for High priority
Close the column-formatting pane. Open All Items → Format current view. Choose Conditional formatting → Manage rules, then Add rule.
In Create rule, set:
- If: Priority
- Comparison: is equal to
- Value: High
- Show list item as: choose a pale rose/pink fill using the style edit icon
Select Save to save the rule. This example uses a built-in color palette; matching its exact shade is optional.
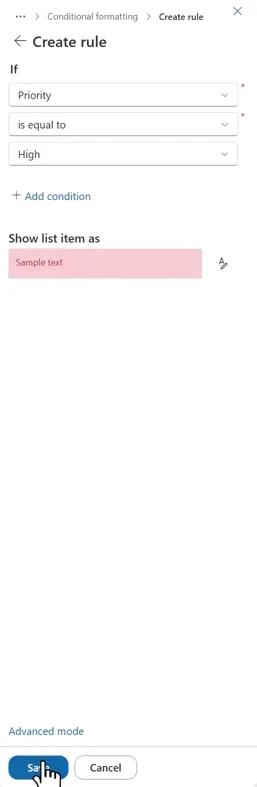
This formats rows in the current view. It does not replace the individual Choice pill styles. Microsoft: formatting list views.
With several sample requests added, the list looks like this:

The Facility Request row is highlighted because its Priority is High. The other rows show different categories and statuses, including a Completed software request with resolution text. This step sets a style only for High, so your other rows may not match the gray shading here.
You now have a standard list form that asks relevant questions, plus a list view that makes important requests easier to scan. Customize a SharePoint list form with JSON adds JSON layout styling and a list validation rule.
Companion video
Video: How to Customize a SharePoint List Form Without Power Apps. Published August 24, 2026.
If the player is blocked on your network, open the video on YouTube.
Need help applying this to your own setup? Read about consulting.