 Office Solutions Pro
Create Word and PDF documents from a SharePoint list item
Fill a Word template from a selected SharePoint list item with the premium Word connector, convert it to PDF, and keep one current Word file and PDF for each item.
On this page
- Overview
- Before you begin
- 1. Build the Word template
- 2. Start the flow
- 3. Get the whole item
- 4. Combine multi-select values
- 5. Fill in the Word template
- 6. Create the Word file
- 7. Convert to PDF
- 8. Move the files and replace older copies
- 9. Test the flow
- Other people using the flow
- Troubleshooting
- Related articles
A SharePoint list stores data well, but sometimes people need a document: a signed-off request, a record copy, or something to send outside the team. This walkthrough builds a flow that turns one selected list item into a Word document and a PDF.
The same approach helps if your list once used InfoPath forms. Microsoft announced that InfoPath Forms Services would be removed from SharePoint Online after July 14, 2026. Data held in list columns can still feed a template like this one. Form data that exists only inside exported form files needs its own plan.
Before you begin
You need:
- A SharePoint list. The example, Requested Projects, has text, Choice, multi-select Choice, and Person columns.
- A separate library for templates and working files. The example uses
Template Processing, with aRequest Intake Templatefolder. Each run also makes its own folder in this library. - A final location. The example uses a
Project Requestsfolder in Documents. - Microsoft Word desktop on Windows. The Developer tab is not available in Word on the web, and template creation in Word for Mac is not supported.
- Premium licensing. Word Online (Business) is a premium connector. This flow starts from the list, so it runs under the license of whoever starts it. Each of those people needs a Power Automate Premium license, unless the flow itself is assigned a Process license, which covers everyone who runs it. See Licensing. If that does not fit your organization, see the article on generating PDFs with standard connectors.
- No MFA conditional access policy on the Populate action. The Populate action can’t be used if an MFA conditional access policy is enabled. Check with your administrator if this applies.
1. Build the Word template
- Lay out your document, including headings and field labels.
- If you do not see the Developer tab, turn it on in Word’s options.
- Click where a value should go, and select the Plain Text Content Control.
- Select Properties, then enter a Title. This is the name you will see in the flow, so match the SharePoint column. Give every control a different Title, because content control names in the template have to be unique.
- If the value can run to more than one paragraph, such as Business Problem, also select Allow carriage returns (multiple paragraphs) in the same dialog. The connector renders line breaks when this setting is on.
- Repeat for each field.
- Save the file as a normal
.docx. It does not need to be a template file. - Upload it to your template folder.
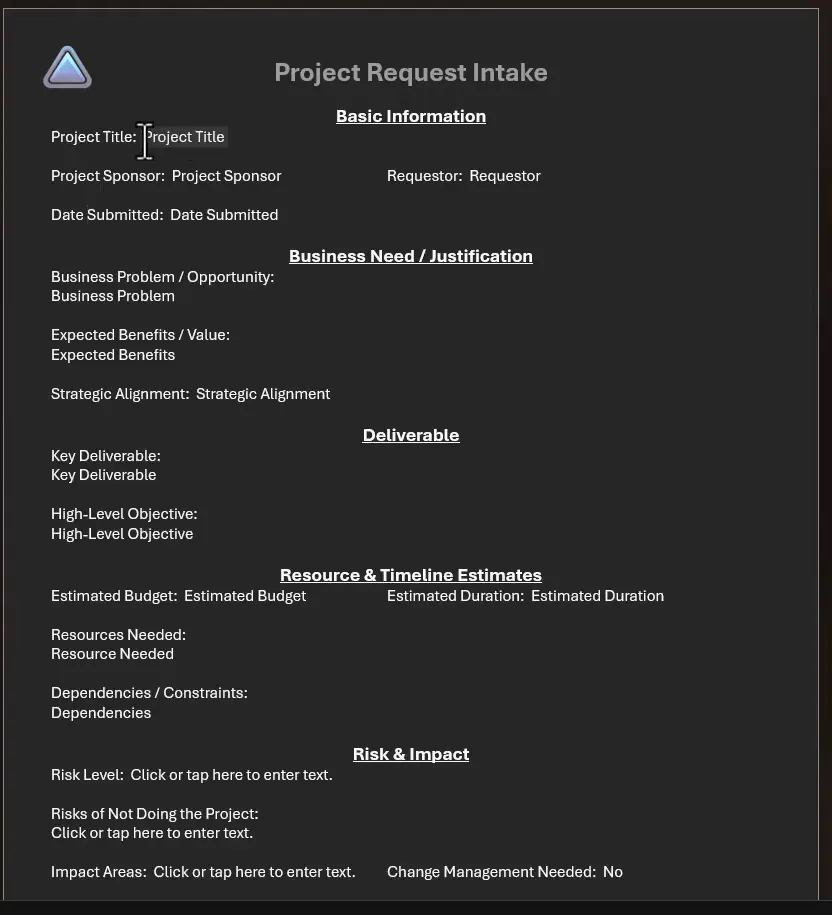
Use plain text controls. The connector doesn’t support rich text, building block gallery, date picker, or check box content controls, or legacy form controls. Input files can be up to 10 MB.
To show the same value twice, for example the project title at the top and again in a summary, add a second control with its own Title, such as Project Title Summary. In step 5, map both controls to the same column. If you copy and paste a control, change the copy’s Title.
Allow for long values. A long answer pushes everything below it down the page, so test with your longest realistic data, including text with several paragraphs.
2. Start the flow
Build the flow in the default environment. The list’s flow menu only lists flows from there for this trigger.
- In Power Automate, select the default environment, and create a new flow.
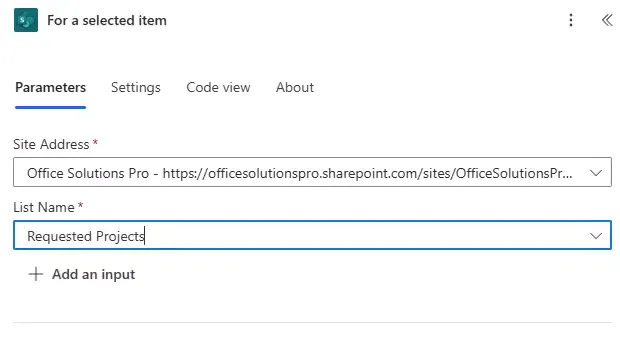
- Add the SharePoint trigger For a selected item.
- Select your site and list.
3. Get the whole item
The trigger does not include every column.
- Add the SharePoint action Get item.
- Select the same site and list.
- Set Id to the ID from the trigger.
4. Combine multi-select values
Skip this step if your list has no multi-select columns.
- Add Initialize variable, with Name
varImpactAreasand Type String. - Add Append to string variable, and select
varImpactAreas. - In Value, select Impact Areas Value, then type a comma and a space. You can use another separator if you prefer.
The designer wraps the action in a For each loop, which adds one value at a time.
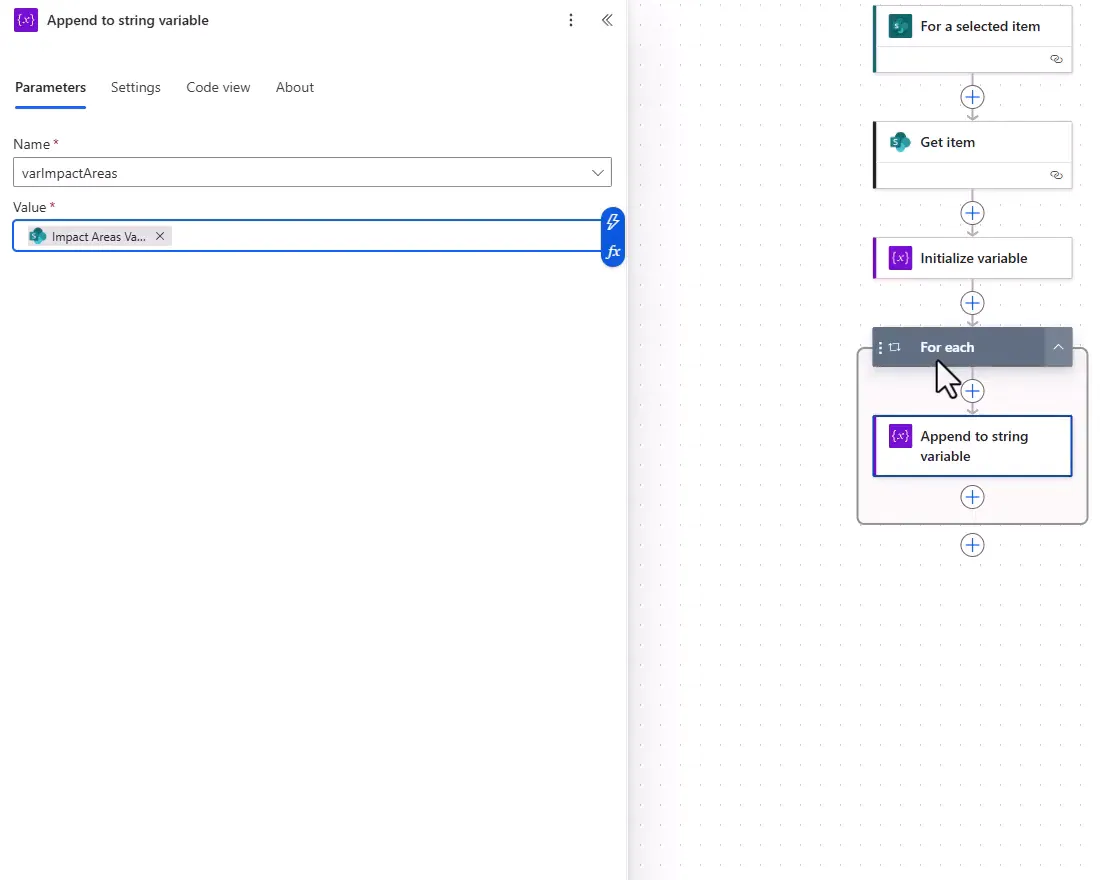
This leaves a comma after the last value.
5. Fill in the Word template
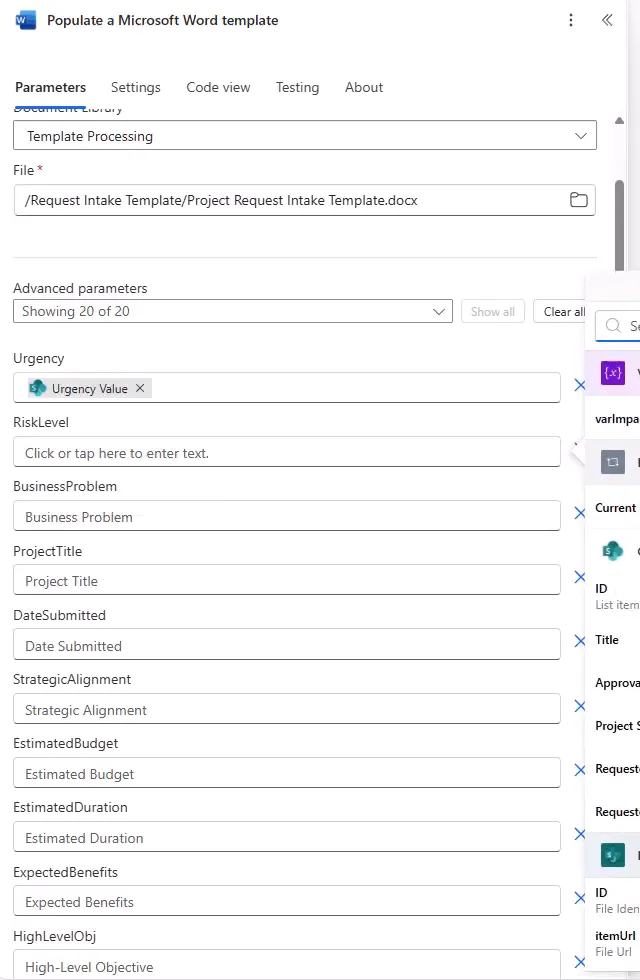
- Add Populate a Microsoft Word template, outside the For each loop.
- Select your site, your template library, and your template file.
- Select Show all to list every control.
- Fill in each control from Get item:
- For Choice columns, choose the entry ending in Value.
- For the multi-select column, choose
varImpactAreas. - For a person, choose the detail you want. The example uses Created By DisplayName as the requester.
- If a value appears twice in the template, map both of its controls.
6. Create the Word file
Each run creates its working files in a folder of its own, so two runs never share a working file.
-
Add the SharePoint action Create new folder. Select your site, set List or Library to your working library, and set Folder Path to
Runs/followed by this expression:workflow()?['run']?['name']workflow()returns details of the current run, including the run’s name, which is different for every run. -
Add the SharePoint action Create file, and rename it
Create file (Word Document). -
Set Folder Path to the run folder: your working library, then
/Runs/, then the same expression. In the example, that is/Template Processing/Runs/followed by the expression. -
Set File Name to
Request-, then ID from Get item, then.docx. -
Set File Content to Microsoft Word document from the Populate action.
-
Name and save the flow.
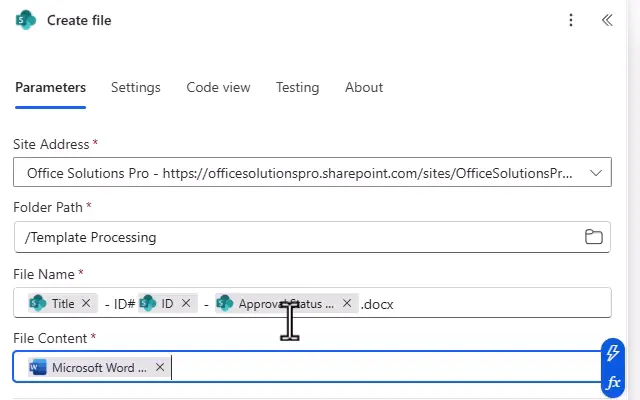
The example in the screenshot builds the name from the title, ID, and status, at the top of the library. Use the run folder and the Request- name instead, for the reason below.
The finished files are named from the item’s ID alone, such as Request-42.docx and Request-42.pdf. The ID never changes, so every run for an item ends at the same two files, even after someone edits the title. The title appears inside the document, in its own control. If you’d rather keep a history, see File names and repeat runs for what each naming choice keeps.
Test now. Run the flow from the list, and open the document in its run folder. If you only need a Word file, skip step 7, and build only the first Move file in step 8.
7. Convert to PDF
Convert Word Document to PDF doesn’t support files labeled Confidential or Highly Confidential. Handle those files outside this flow.
-
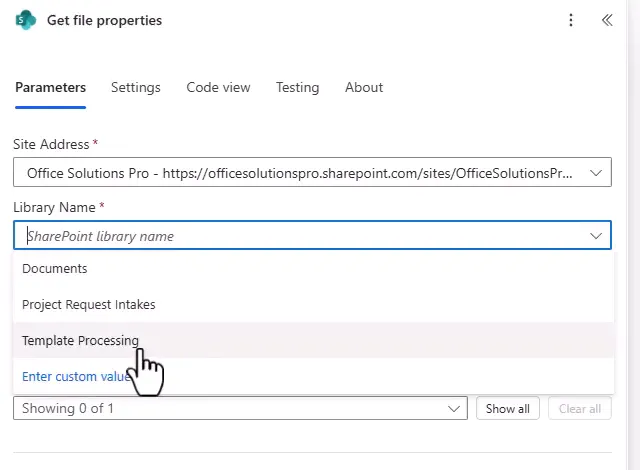
Add Get file properties. Select the site and library, and set Id to ItemId from Create file (Word Document).
-
Add Convert Word Document to PDF, and select your site and library.
-
In File, type
/Runs/, add the same run-name expression, and type/. Then select File name with extension from Get file properties. The path starts inside the library, so leave out the library’s name. -
Add another Create file, and rename it
Create file (PDF Document). -
Use the same run folder and name, but end the name in
.pdf. -
Set File Content to the output of Convert Word Document to PDF.
8. Move the files and replace older copies
Moving files gives you a Replace option, which lets you run the flow again for the same item. A moved file keeps its name, so the final files are Request-<ID>.docx and Request-<ID>.pdf.
- Add the SharePoint action Move file, and rename it
Move file (Microsoft Word). - Select your site in Current Site Address and Destination Site Address, and set File to Move to body/Id from Create file (Word Document).
- Set Destination Folder to your final folder.
- Set If another file is already there to Replace.
- Add a second Move file for the PDF, using the ID from Create file (PDF Document).
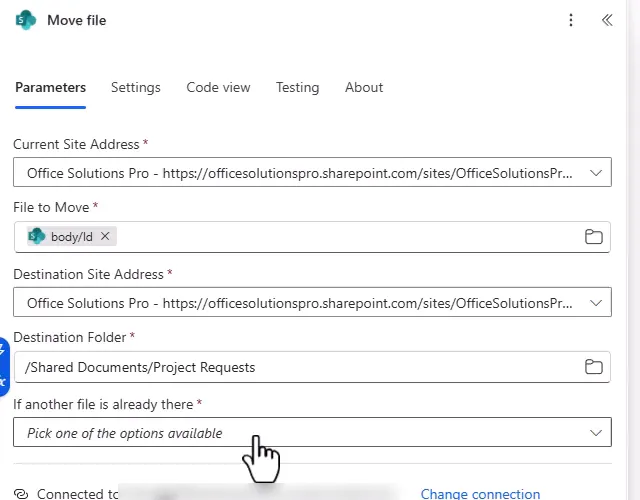
Because the files are moved, the run’s folder is left empty, and you do not need a delete step for the files.
The empty run folder stays in Runs. If a run fails, its folder keeps any working files that weren’t moved out, so you can see how far it got. The folder is named with the run’s name, which workflow() returns, so you can match it to the run in the run history.
Delete old run folders by hand. From time to time, open Runs in your working library and delete old folders. Before you delete one, make sure no run is in progress, and that the final documents for that item are in the destination folder and open correctly. Keep a failed run’s folder until you’ve found out why it failed. Delete only folders inside Runs, never Runs itself or the destination folder.
Run the flow for one item at a time
This flow is meant for one generation of an item’s documents at a time, however it’s started and whoever starts it. Nothing in the flow enforces that. Separate run folders keep two runs from sharing a working file, but every run still replaces the same two final files, and each Move file replaces its file on its own:
- Both runs can succeed without an error. Each final file shows the run that last replaced it. If two runs for the same item overlap, the Word file can come from one run and the PDF from the other, and the item may have changed in between.
- If a run fails after the first Move file succeeds and before the second one does, the Word file is new and the PDF is from an earlier run, or missing if there was none.
So agree with everyone who runs the flow not to start it for an item that already has a run in progress. After a run that failed or overlapped another, open both final files and check that they match the item and each other. To repair a mismatched pair, wait until no other run for the item is in progress, then run the flow once more. If that run succeeds, both files come from it.
9. Test the flow
- Save the flow.
- In the list, select an item, then select Integrate > Flows and your flow. The first time, select Continue. Then select Run flow.
- Open the destination folder.
Request-<ID>.docxandRequest-<ID>.pdfshould be there. - In
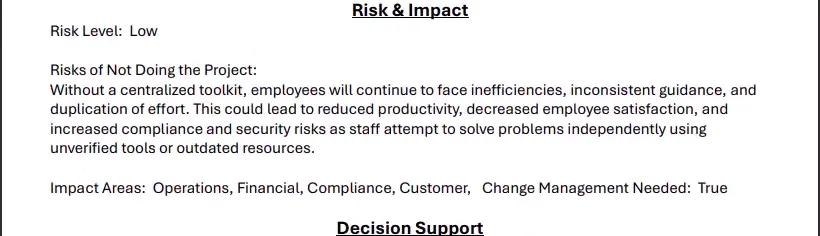
Runs, the run’s folder is still there, and empty. - Open each file, and look at multi-select values, dates, and spacing. Check a long text field that has several paragraphs, and confirm the paragraph breaks appear.
- Run the flow on the same item again. The files should be replaced, not duplicated.
- Change the item’s title, and run the flow again. There should still be one Word file and one PDF for the item, showing the new title inside.
Change the template’s fonts and spacing as needed, then upload it again. Flows use the latest file in the template location.
Other people using the flow
Add people under Manage run-only users on the flow’s details page. They need Edit permissions on the list to run flows, access to the destination folder to read the results, and the license described above.
Troubleshooting
| Symptom | Likely cause | What to do |
|---|---|---|
| A control does not appear in the Populate action | It is an unsupported type or has no Title | Use a plain text control with a Title |
| A field you placed twice doesn’t fill as expected | Both controls share a Title | Give each control its own Title, and map both in the Populate action |
| A long value appears as one paragraph | Allow carriage returns (multiple paragraphs) is off for that control | Turn it on in the control’s Properties, and upload the template again |
| Some values are missing | The value came from the trigger, not Get item | Use the Get item token |
| The file has no extension and won’t open | .docx or .pdf is missing from File Name | Add it to the name |
| Create file fails | Folder Path doesn’t match the folder that Create new folder made | Use /Runs/ and the same run-name expression in both |
| A repeat run fails at Move file | If another file is already there isn’t set to Replace | Set it to Replace |
Empty folders build up in Runs | Each run leaves its folder behind | Delete old folders by hand, as described in step 8 |
| The Word file and the PDF show different values | Two runs for the item overlapped, or a run failed between the two Move file actions | Wait until no run for the item is in progress, run the flow once more, and check both files |
| An item has more than one Word file or PDF | The name includes something that changes, such as the title | Name the files from the ID only |
| The flow is not under Integrate > Flows | It is in another environment, or it’s turned off | Build it in the default environment, and turn it on |
| The conversion cannot find the file | File does not hold the run folder’s path | Use /Runs/, the run-name expression, /, and File name with extension |
| A step after Create file cannot find the new file, although the path is right | The file is not available yet | Microsoft recommends a short delay, about a minute, before later actions use a file created from the Word connector. Add a Delay before the step that fails |
| The conversion fails for a labeled file | The file has a Confidential or Highly Confidential sensitivity label | Handle these files outside the flow |
| Text overlaps or runs across a page | Long values push content down | Adjust spacing in the template and test with long values |
| The Populate action fails for one user | MFA policy or license | Review the items under Before you begin |
Related articles
To process many items at once, see the article on batch generating Word and PDF documents from a SharePoint list.
Companion video
Video: Create Microsoft Word & PDF Docs Automatically from SharePoint (Power Automate Tutorial). The video creates the files at the top of the template library, named from the title, ID, and status, before moving them. The steps here use a folder for each run and name the files by ID only, so the paths and repeat runs differ from the video.
If the player is blocked on your network, open the video on YouTube.
Need help applying this to your own setup? Read about consulting.