 Office Solutions Pro
New Outlook for Windows: a practical guide to email, search, and calendar
Set up new Outlook for Windows, find messages faster, automate your inbox with categories, Quick steps, rules, and Sweep, and get more from To Do and your calendar.
Many people use Outlook every day without anyone ever showing them how to get the most from it. This guide walks through new Outlook for Windows, from the layout to the features that save the most time. You can read it in order or jump to the section you need.
If you use classic Outlook, some of this won’t apply yet. Microsoft keeps a feature comparison between new and classic Outlook that shows what is available in each.
Before you begin
Availability varies, so don’t be surprised if your screen differs from the images here.
- Organization settings. Your administrator can turn features off. Copilot, weather, and some calendar options are common examples.
- Account type. Several features need a work or school account, and Mail Templates and work hours need a qualifying Microsoft 365 subscription.
- Government clouds. Microsoft’s comparison lists new Outlook as available for GCC, and as upcoming for GCC High and DoD. GCC High and DoD organizations can enable a public preview. Features can arrive at different times, so check Microsoft’s government cloud release notes.
Most steps below start in Settings. Select File > Settings, or View > View settings.
Learn the layout
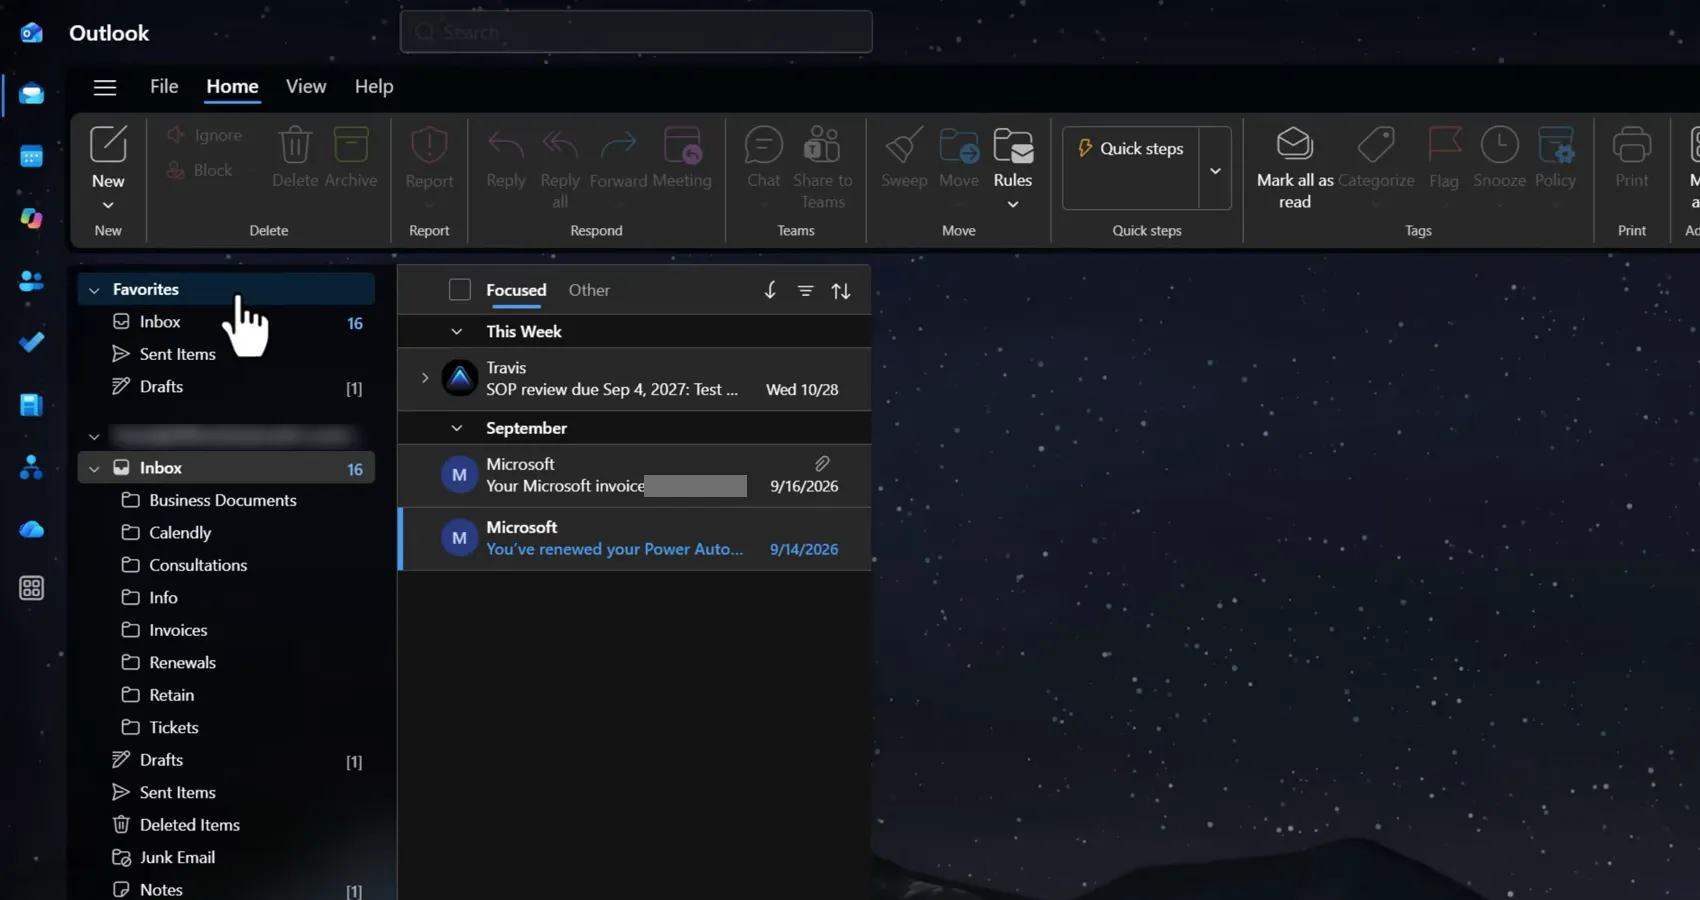
- App bar (far left). Moves between Mail, Calendar, Copilot, People, To Do, OneDrive, and other apps. Your list depends on your organization.
- Search box (top). Searches your mailbox. Find messages faster, below, explains how to narrow it down.
- Folder pane. Shows Favorites above your full folder list.
- Copilot. Appears only if it is available to you.
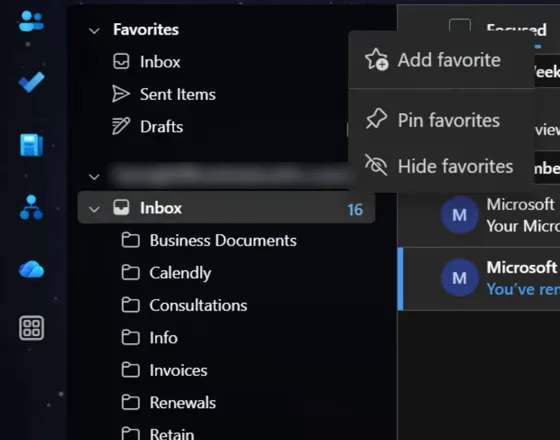
Favorites are optional but handy. Right-click a folder you use often to add it. If you don’t want the section, right-click Favorites and select Hide favorites.
Change how Outlook looks
Go to Settings > General > Appearance.
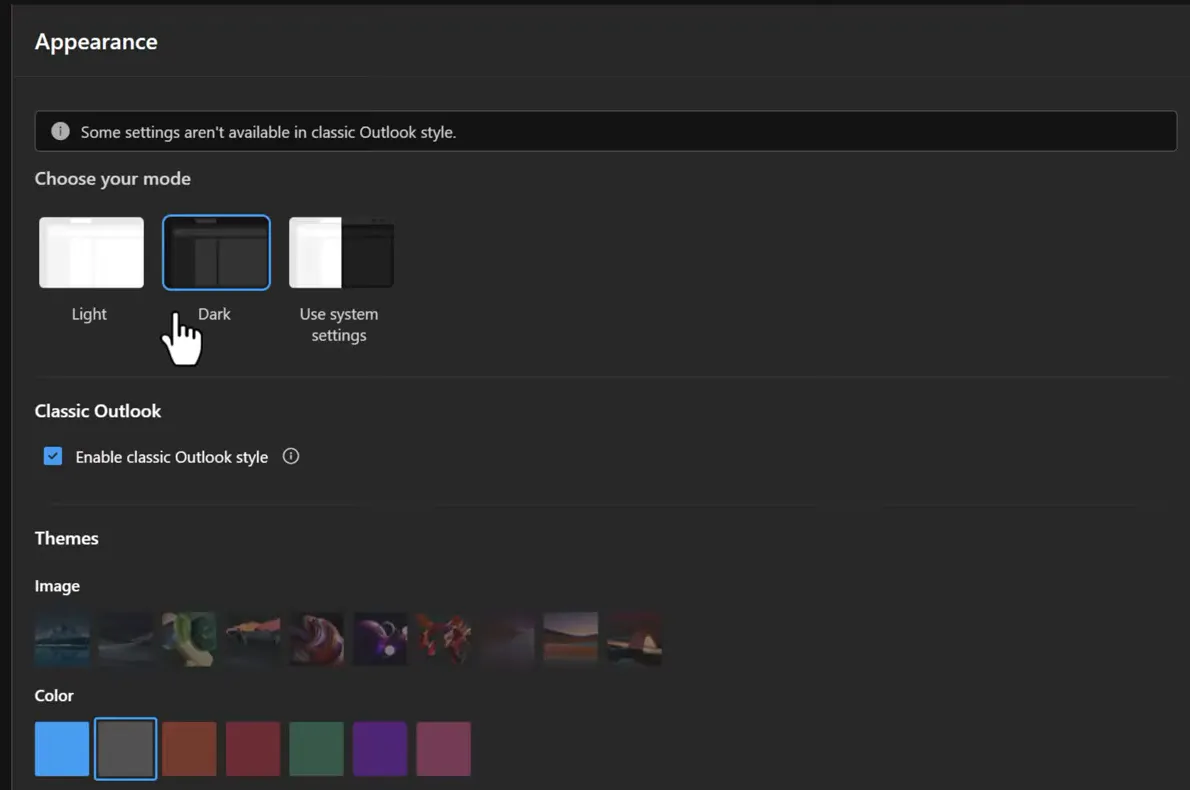
From here you can:
- Choose Light, Dark, or Use system settings.
- Select Enable classic Outlook style if you prefer the older look. Outlook notes that some settings aren’t available in this style.
- Pick a theme image or color, or open Classic themes.
- Under Navigation bar, choose whether to use colored app icons and show app names. App names can help while you learn the icons.
Select Save when you finish.
Set up your inbox view
Go to Settings > Mail > Message List.
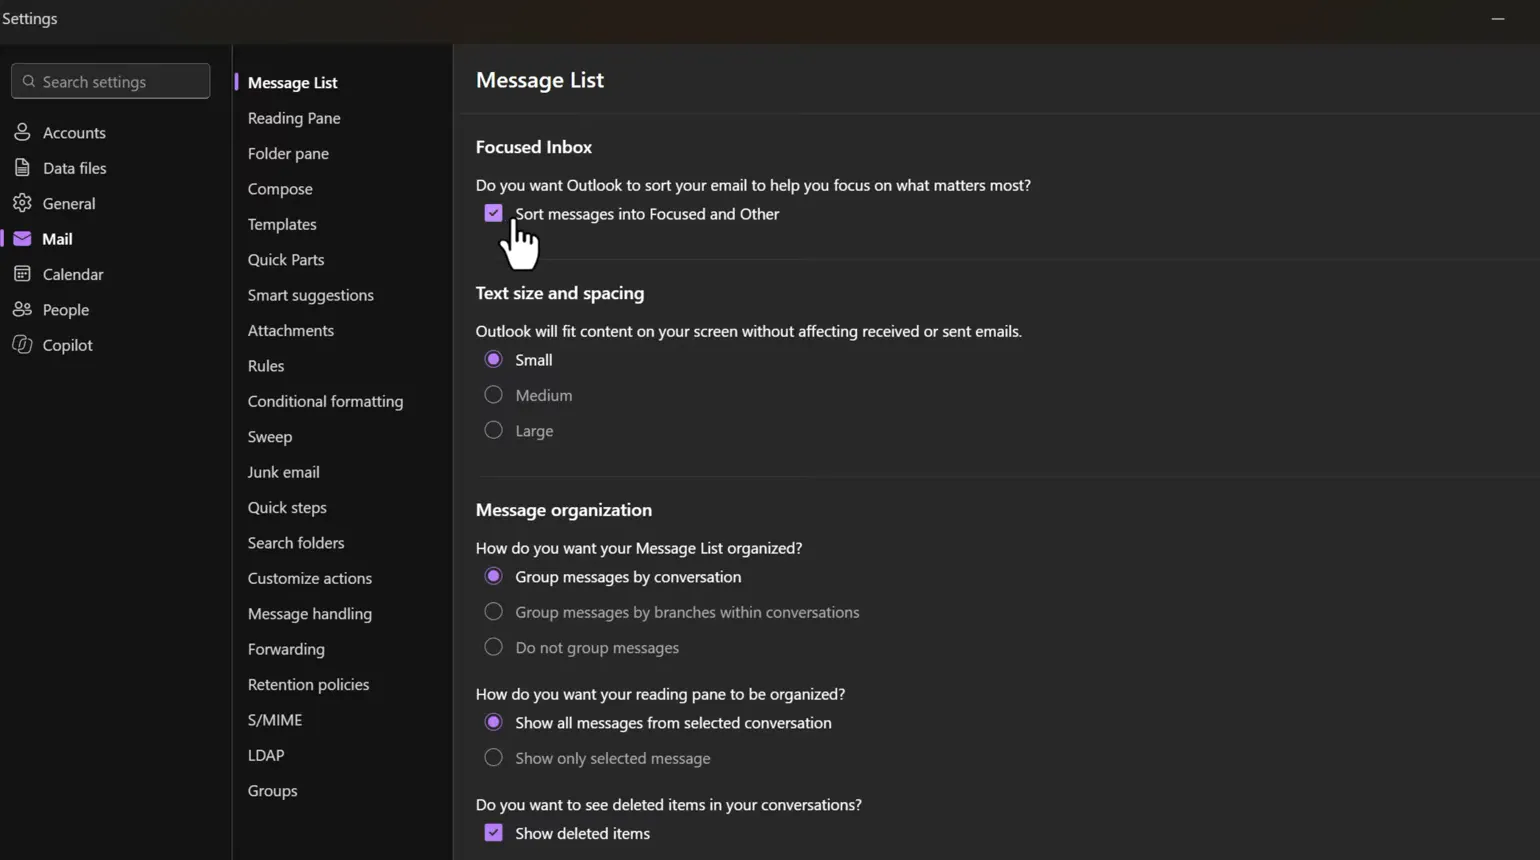
Focused Inbox. Select Sort messages into Focused and Other to split your inbox into two tabs. Clear it to see everything in one list.
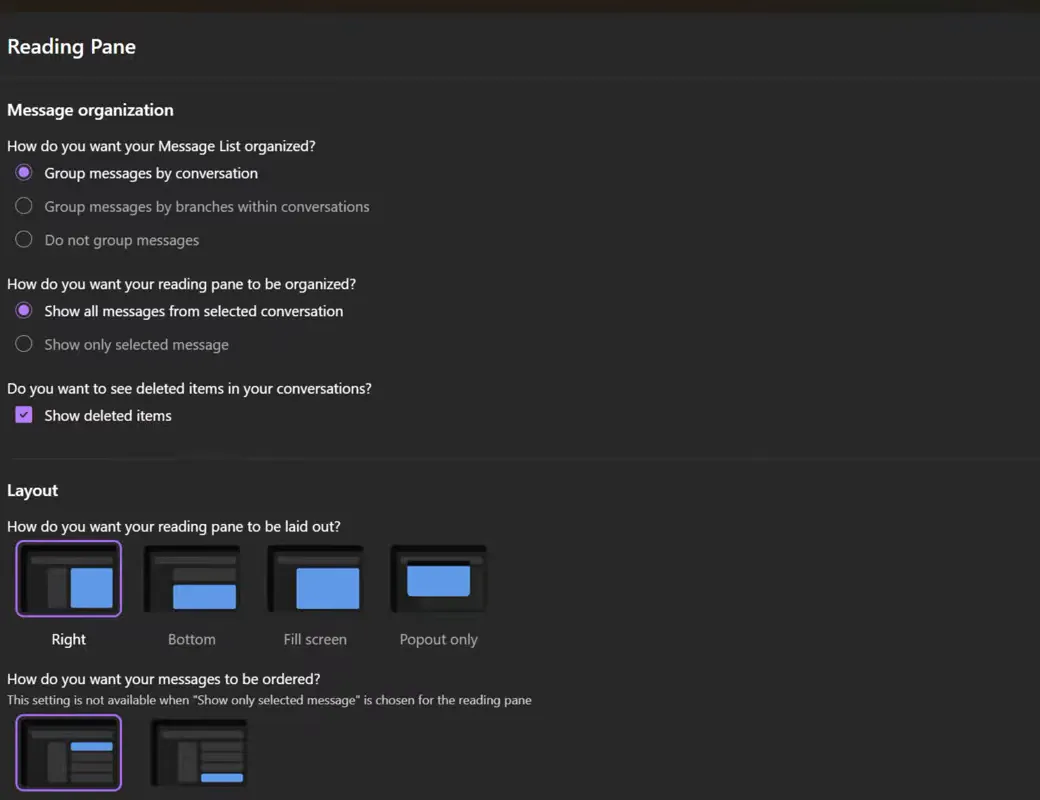
Conversations. Under Message organization, choose how messages are grouped: Group messages by conversation, Group messages by branches within conversations, or Do not group messages. Try each one. If individual messages are hard to spot in search results, turning off grouping can help.
Sender or subject first. Lower on the same page, you can choose whether the sender or the subject appears first. Subject first suits people who look for topics rather than people.
Reading pane. Go to Settings > Mail > Reading Pane. Under Layout, choose Right, Bottom, Fill screen, or Popout only, then select Save.
Pick up where you left off
If your computer restarts at the end of the day, this setting saves you from finding everything again.
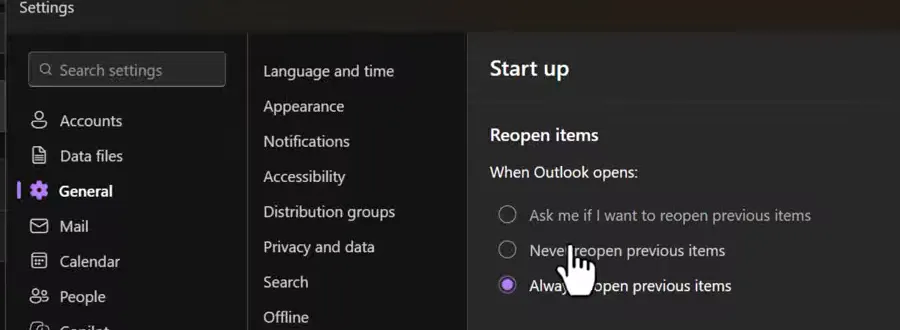
- Go to Settings > General > Start up.
- Under Reopen items, select Always reopen previous items. The other choices are to be asked each time, or never to reopen them.
- Select Save.
Treat this as a convenience. After a crash or forced restart, items may not all come back, so keep saving your drafts.
Keep important messages in view
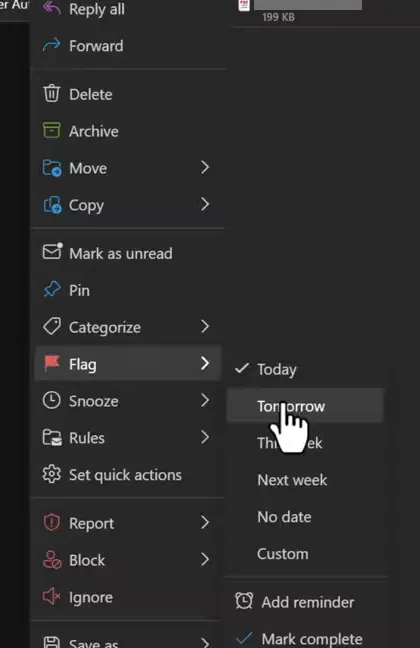
Right-click a message to see these options, or hover over it for quick buttons.
- Pin keeps a message at the top of the list until you unpin it.
- Flag marks it for follow-up. Choose a date such as Today or Tomorrow. Flagged messages also appear in To Do, under the Flagged Email list. Only flags in your primary mailbox sync to To Do, not flags in shared mailboxes or shared folders.
- Snooze removes a message from your inbox and brings it back at the time you choose, such as Later today. Until then, it waits in the Snoozed folder, where you can open it at any time.
- Archive moves a message to your Archive folder, which clears it from your inbox without deleting it.
Find messages faster
Set the search scope
Go to Settings > General > Search.
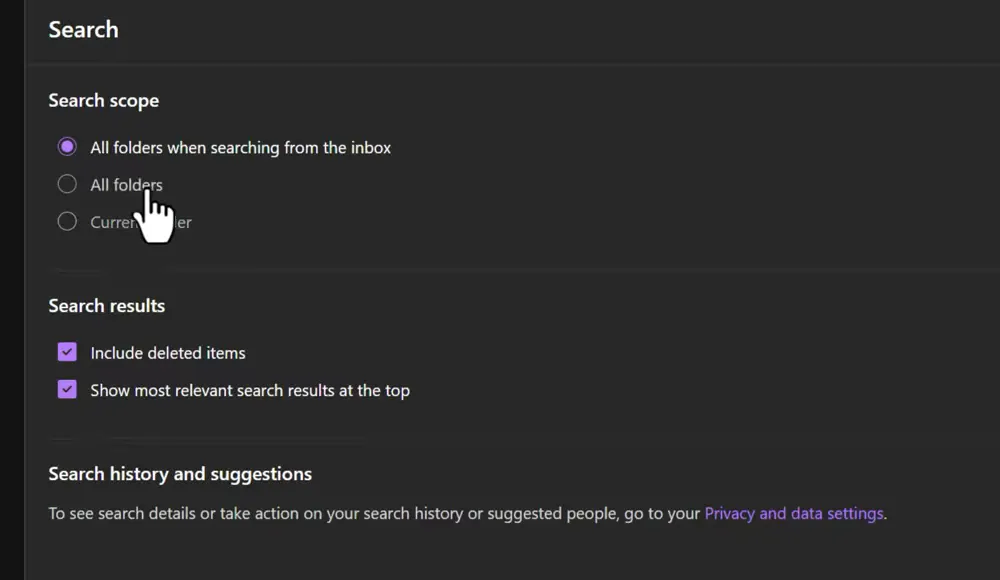
- Search scope: choose All folders when searching from the inbox, All folders, or Current folder.
- Include deleted items: keep this on if you want results from Deleted Items.
- Show most relevant search results at the top: turn this on for best matches first, or off to see results without that ranking.
Use search filters
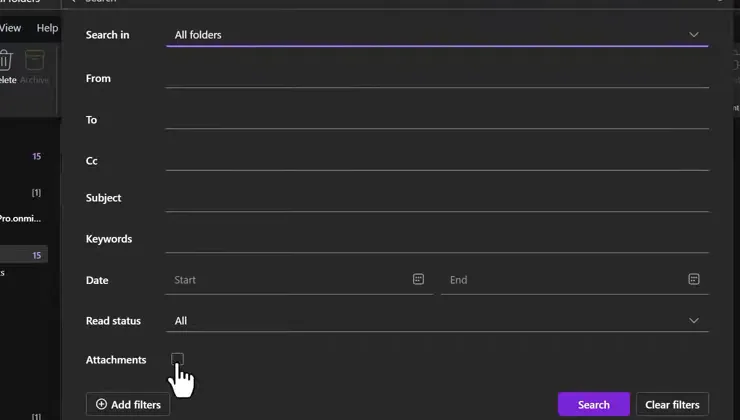
Select the search box, then open the filters. You can narrow results by folder, From, To, Cc, Subject, Keywords, Date, Read status, and Attachments.
Type search operators
You can also type operators directly in the search box:
| Type this | To find |
|---|---|
from:"Pat Lee" | Messages from that person |
subject:invoice | Messages with that word in the subject |
hasattachment:yes | Messages with attachments |
from:"Pat Lee" AND hasattachment:yes | Both conditions together |
Type operators such as AND and OR in uppercase.
Create a Search Folder
A Search Folder is a virtual folder. It shows every message that matches its criteria, wherever that message is stored. Nothing moves, and messages can stay in their real folders.
- In the folder pane, right-click Search Folders and select Create new search folder.
- Select Add search folder, and enter a name.
- Choose a Type, such as Flagged for follow-up.
- If you like, select Filter to specific folders.
- Select Save, then expand Search Folders to see it.
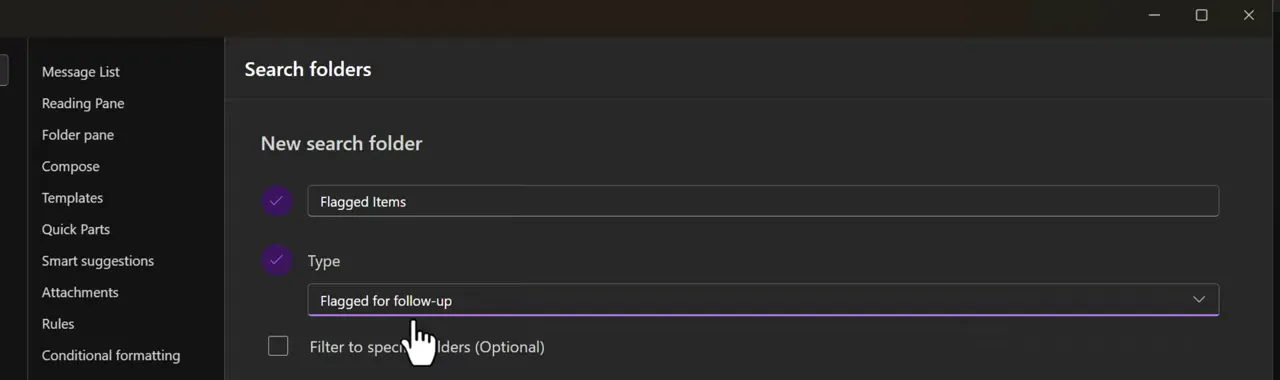
New Outlook uses predefined types, and advanced custom Search Folders stay in classic Outlook. The types include:
- Unread mail, flagged mail, and important mail
- Mail from specific people, and mail sent directly to you
- Categorized mail
- Mail with attachments, large mail, and old mail
- Mail with specific words
Mail with specific words is useful for something like an Invoices folder, which then gathers those messages even if a rule files them elsewhere.
Organize and automate your inbox
Each of these tools solves a different problem:
| Tool | What it does | How it runs |
|---|---|---|
| Category | Adds a colored label | You apply it |
| Conditional formatting | Changes how matching messages look in the list | Automatically |
| Search Folder | Shows matching messages in one view, without moving them | Automatically |
| Quick step | Runs several actions on a selected message | You select it |
| Rule | Acts on incoming messages | Automatically |
| Sweep | Clears out messages from one sender | You start it, and some choices continue |
Outlook’s feature comparison lists Quick Steps, rules, conditional formatting, and Search Folders as only partly available compared with classic Outlook, so some classic options may be missing.
Categories
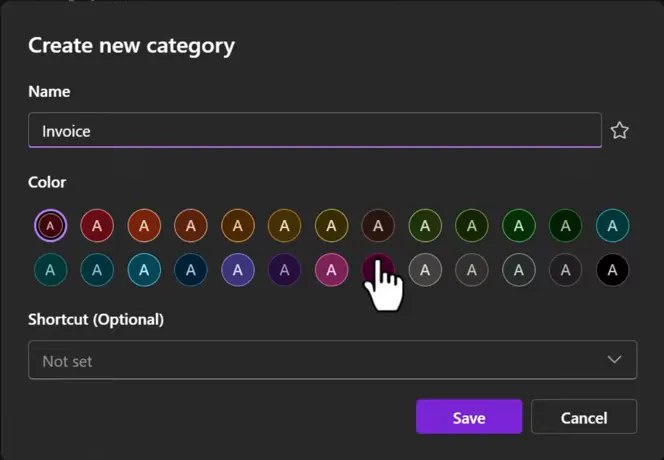
- Go to Settings > Accounts > Categories.
- Select Create category, then enter a name and choose a color. A keyboard shortcut is optional.
- Select Save.
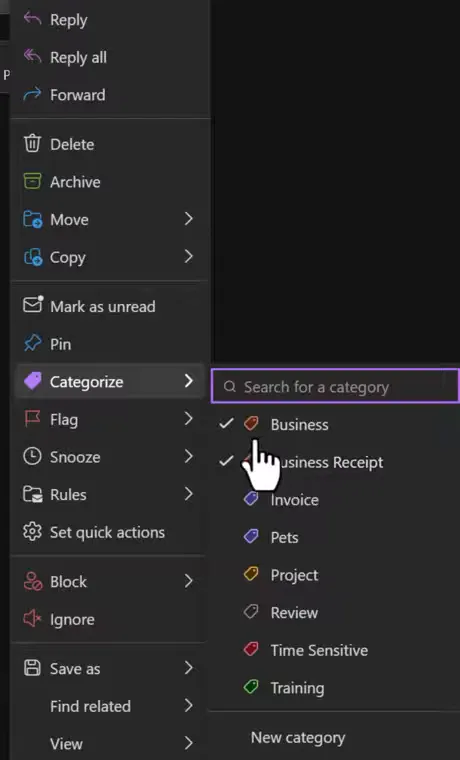
To use one, right-click a message, point to Categorize, and select a category. A message can have more than one.
Conditional formatting
Use this to make certain messages stand out, such as those from your manager.
- Go to Settings > Mail > Conditional formatting, and add a new rule.
- Name the rule.
- Add a condition, such as From and a person.
- Choose the formatting, such as Font color and Font style.
- Select Save.
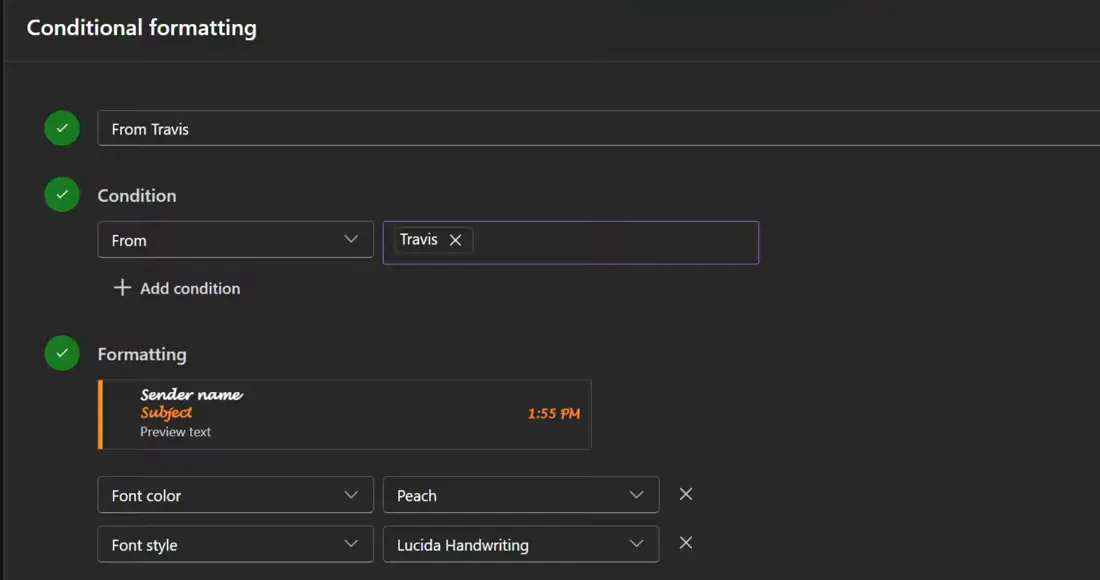
These rules apply to read and unread messages in all folders except Drafts. Keep the text readable, and don’t rely on color alone, since not everyone can tell colors apart.
Quick steps
A Quick step runs several actions in one click.
- On the Home tab, open the drop-down next to Quick steps, and select Manage quick steps. You can also go to Settings > Mail > Quick steps.
- Select New quick step, and enter a name.
- Under Choose an action, select an action, such as Mark as read.
- Select Add another action, then add Move to and pick a folder.
- Select Save.
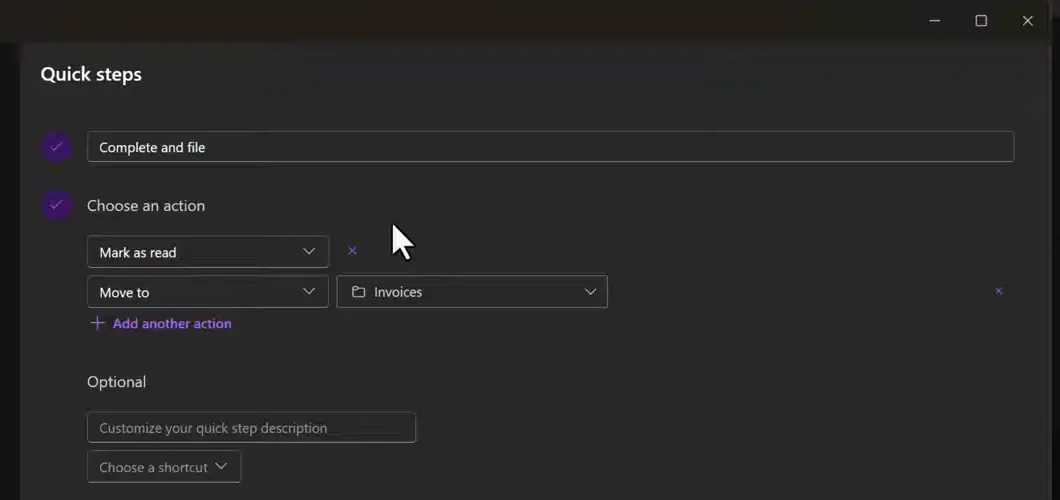
To use it, select a message and choose the Quick step on the ribbon. Check your actions first, because Quick steps can’t be undone with a menu command or Ctrl+Z.
Rules
Rules act on incoming messages without you doing anything.
-
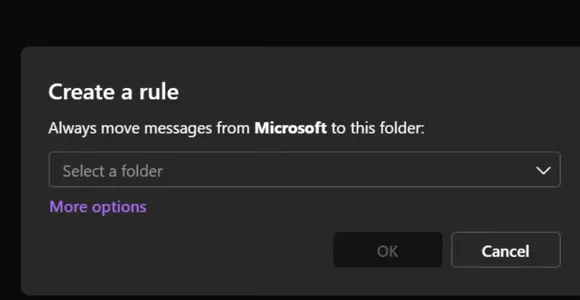
Right-click a message, point to Rules, and select Create rule.
-
To simply move mail from that sender, choose a folder and select OK. For anything else, select More options.
-
Enter a name, such as
Move Invoices. -
Add a condition, such as Subject includes and the word
invoice. -
Add an action, such as Move to and your folder.
-
Decide whether to keep Stop processing more rules selected. When it is on, later rules are skipped for messages that match this one.
-
Select Run rule now to apply it to messages you already have.
-
Select Save.
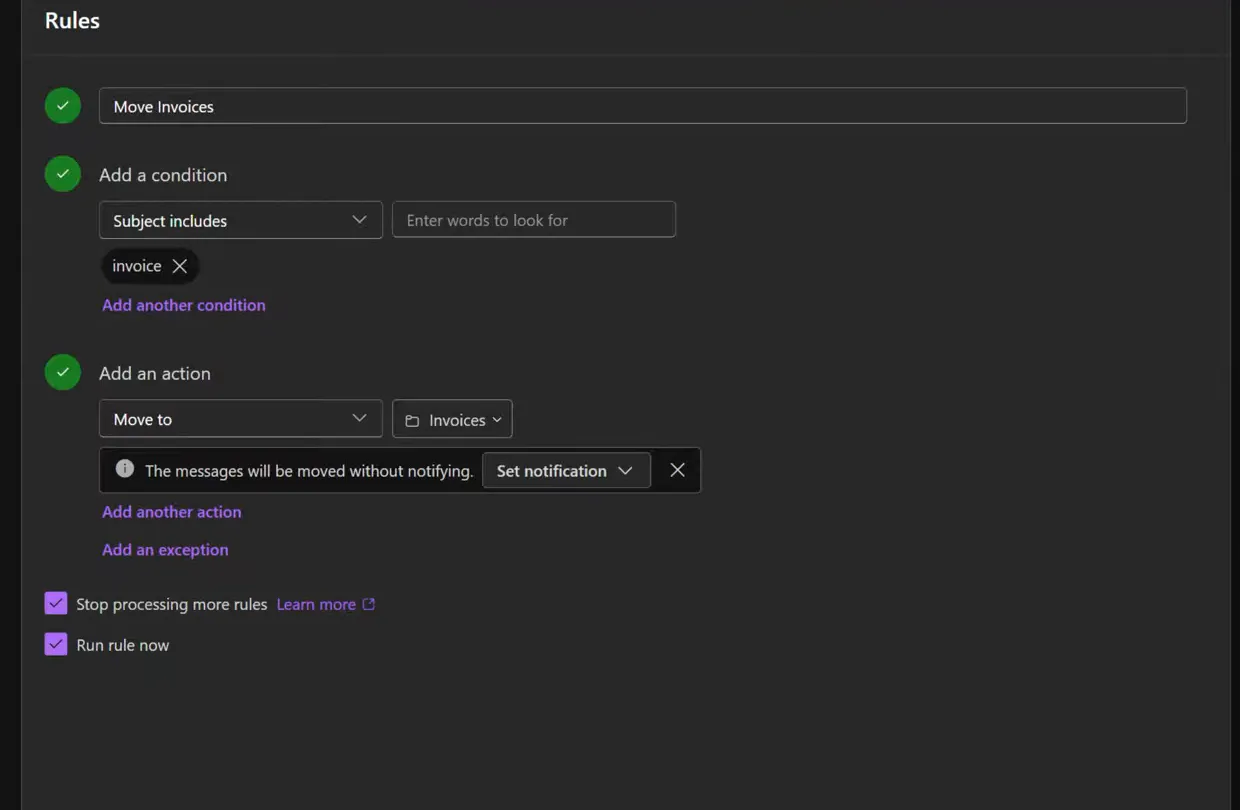
Rules run from top to bottom, so order matters. Newsletters are a good first rule: they go to a folder and wait until you have time.
Sweep
Sweep clears mail from one sender.
- Select a message from that sender, then select Sweep on the ribbon.
- Choose an option:
- Move all messages from the Inbox folder
- Move all messages from the Inbox folder and any future messages
- Always keep the latest message and move the rest from the Inbox folder
- Always move messages older than 10 days from the Inbox folder
- Check Move to carefully. It can be set to Deleted Items.
- Select OK.
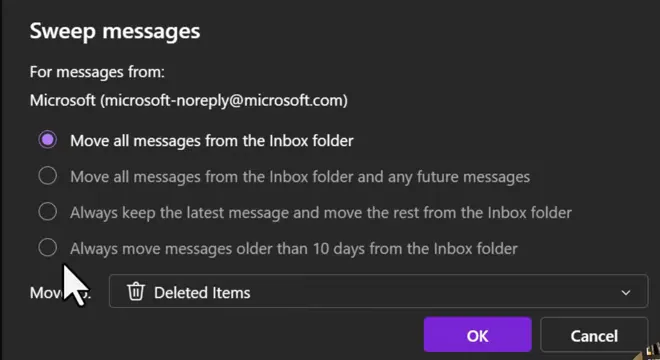
The last three options keep working after today, so use them only for senders you’re sure about. Sweep rules run once per day, and Sweep isn’t available in Junk Email, Drafts, Sent Items, or Deleted Items.
Write and send email
Show more options
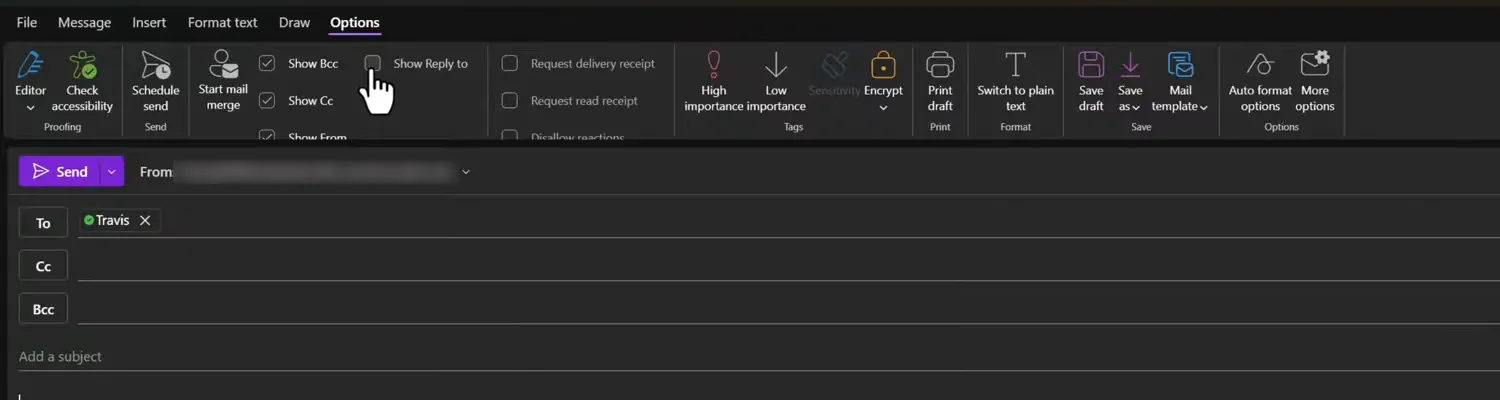
Select New > Mail. Open the message in its own window for more room, then use the Options tab to show Bcc and Reply To.
Signatures
- Go to Settings > Accounts > Signatures, or select Insert > Signature > Signatures in a message.
- Select Add signature, name it, and enter your text. You can also add images or a table.
- Choose the defaults for new messages, and for replies and forwards.
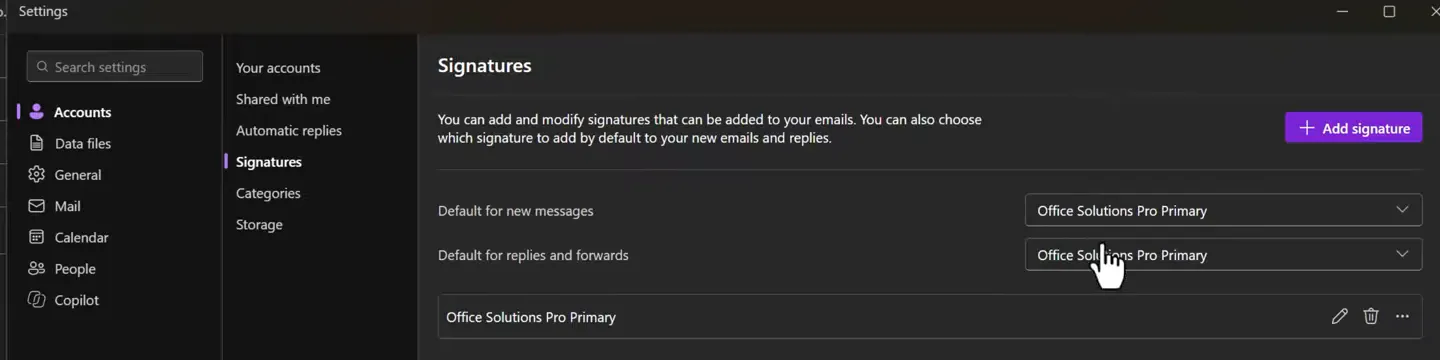
You can keep more than one signature. A second one with your device details, for instance, saves time when you contact a help desk.
Reuse messages with templates
There are two kinds of template:
| Feature | Saves | Best for |
|---|---|---|
| Mail Templates | Whole emails, including recipients, subject, body, and attachments | Messages you send again and again |
| My Templates add-in | Short text snippets | Standard phrases you insert into a message |
To create a Mail Template:
-
Write the email.
-
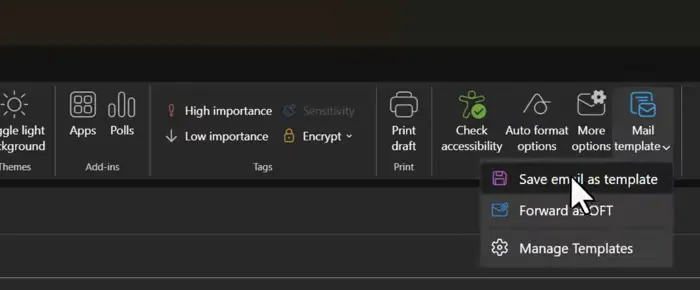
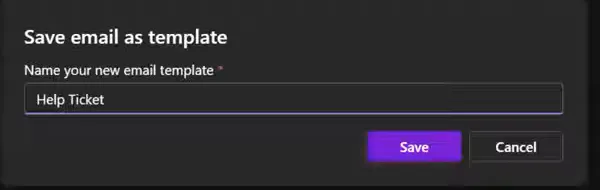
On the Message tab, select Mail template > Save email as template.
-
Name it and select Save.
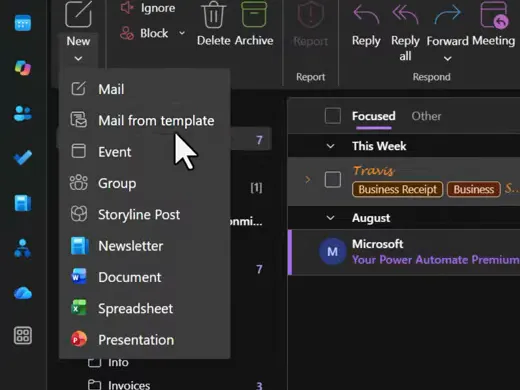
To use it, select New > Mail from template and choose the template.
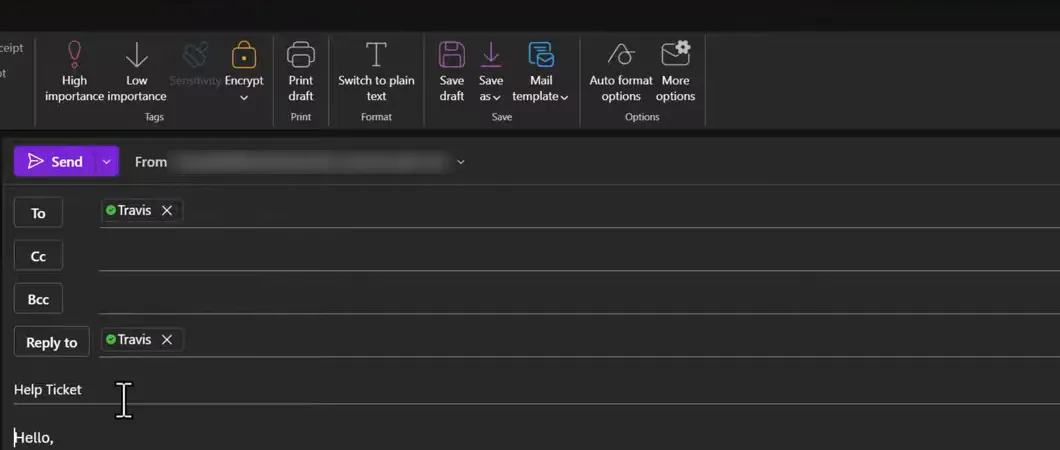
Highlight anything that changes each time, such as a serial number, so that you can spot it before you send.
To use My Templates, select it on the Message tab. If it isn’t there, your organization may have add-ins turned off.
Send replies to someone else
With Reply To showing, add one or more addresses. Replies to your message go there instead of to you.
Schedule a message
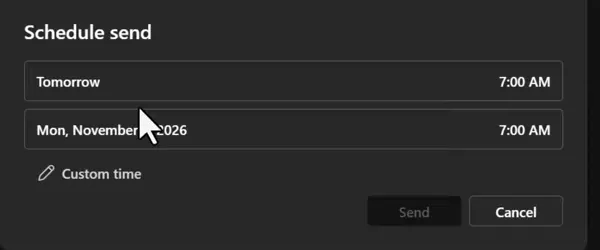
- On the Options tab, select Schedule send. You can also open the drop-down next to Send.
- Pick a suggested time, or select Custom time.
- Select Send.
This isn’t available for IMAP or POP accounts.
The two features work well together before a vacation. Schedule a message for your last day, and set Reply To to a colleague, so that replies reach someone who can act on them. Let that person know first.
Set automatic replies
Go to Settings > Accounts > Automatic replies, turn on the toggle, set your dates, and write your message.
Fix a message you already sent
Undo send. New Outlook supports Undo send. This is your best option, because it stops a message before it leaves. Check its delay under Settings > Mail > Compose.
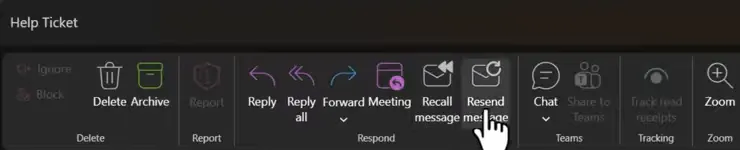
Resend. Open the message from Sent Items and select Resend message to send it again, for example with someone added.
Recall.
-
Double-click the message in Sent Items to open it in its own window.
-
Select Recall message.
-
Choose an option, then select OK. Your version may not offer this option.
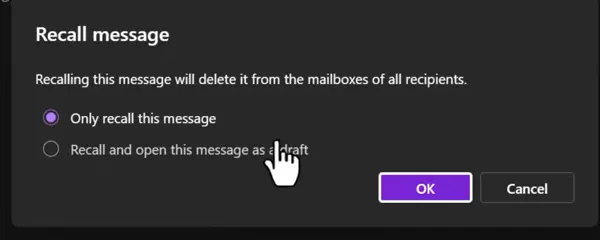
Recall isn’t a guarantee. It needs a work or school account, and personal accounts can’t use it. What it can reach depends on your organization’s Exchange Online recall settings and on where the recipient’s mailbox is:
- In your organization: recall can also remove messages the recipient has already read, if your administrator allows it.
- In another organization: recall works only if that organization also uses Exchange Online and its administrator has added yours to a cross-tenant recall allow list.
- Outside Exchange Online: recall can’t reach other email systems, personal email accounts or on-premises Exchange mailboxes. It also can’t reach copies the recipient forwarded by hand.
Within a few minutes, you receive a Message Recall Report email. Open its link to check the status for each recipient, rather than assuming the recall worked. Exchange Online keeps trying for up to 24 hours.
Manage tasks with To Do and My Day
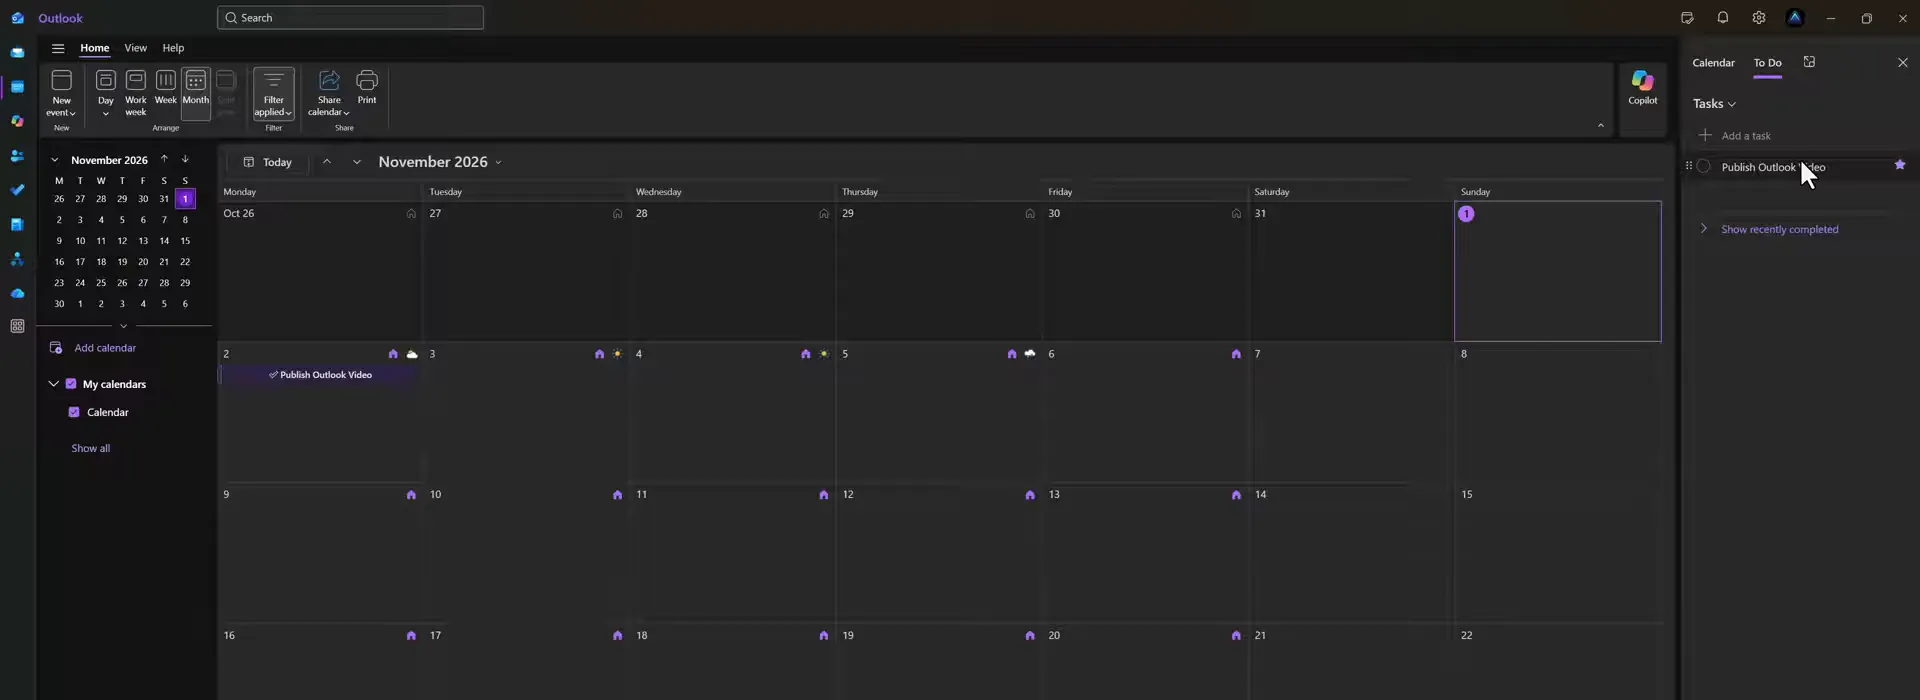
My Day shows your calendar and tasks in a pane beside whatever you’re doing.
- Open My Day from the top of the window, or from the View tab.
- Select the To Do tab, then Add a task, and type your task.
- Select the star to mark it as important. Select the circle to complete it.
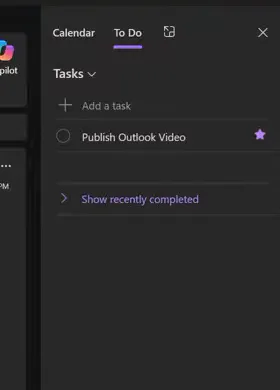
To schedule time for a task, open your calendar and drag the task onto a day or time.
Set up your calendar
Views and sharing
On the Home tab, choose Day, Work week, Week, or Month.
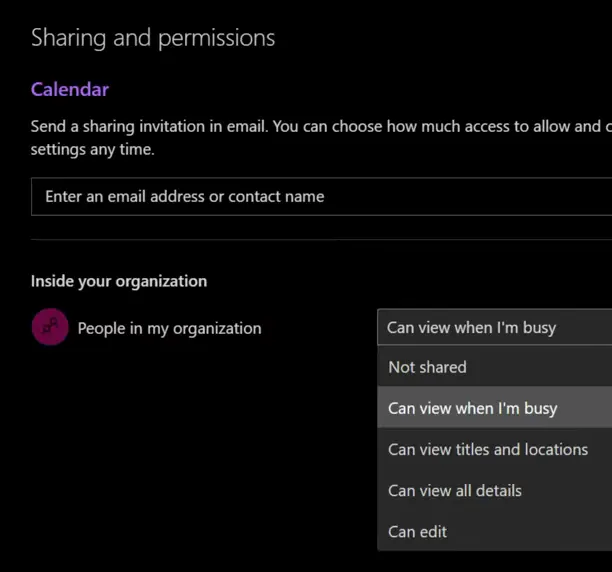
To share your calendar, select Share calendar, or select … next to the calendar and choose sharing. Add a person, then choose how much they can see. Can view when I’m busy shows only when you’re busy, while Can view titles and locations and Can view all details show more. Pick the lowest level that does the job.
Display and time zones
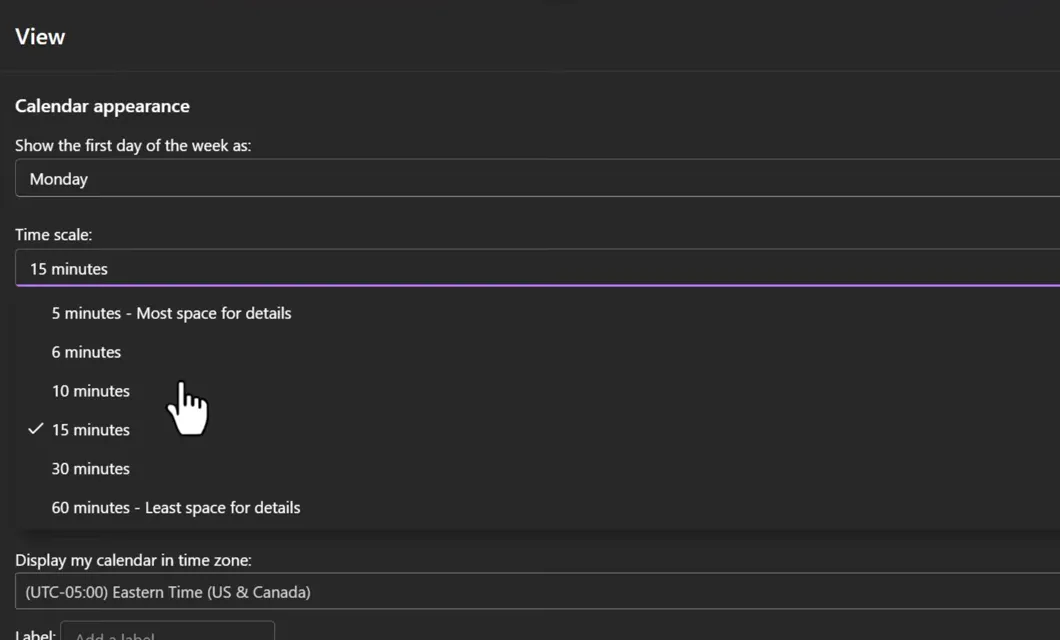
Go to Settings > Calendar > View.
- First day of the week: pick the day your week starts.
- Time scale: choose 5, 6, 10, 15, 30, or 60 minutes.
- Show week numbers: useful if your organization plans by week.
- Time zones: select Add time zone, search for a city, add a label, and select Show in calendar. This helps a lot when you work across regions.
Work hours and location
Set this up, especially if you work with people in other time zones.
- Go to Settings > Calendar > Work hours and location.
- Select your working days.
- Set the hours and location for each day.
- Choose whether to show your location, and who can see the details.
- Select Save.
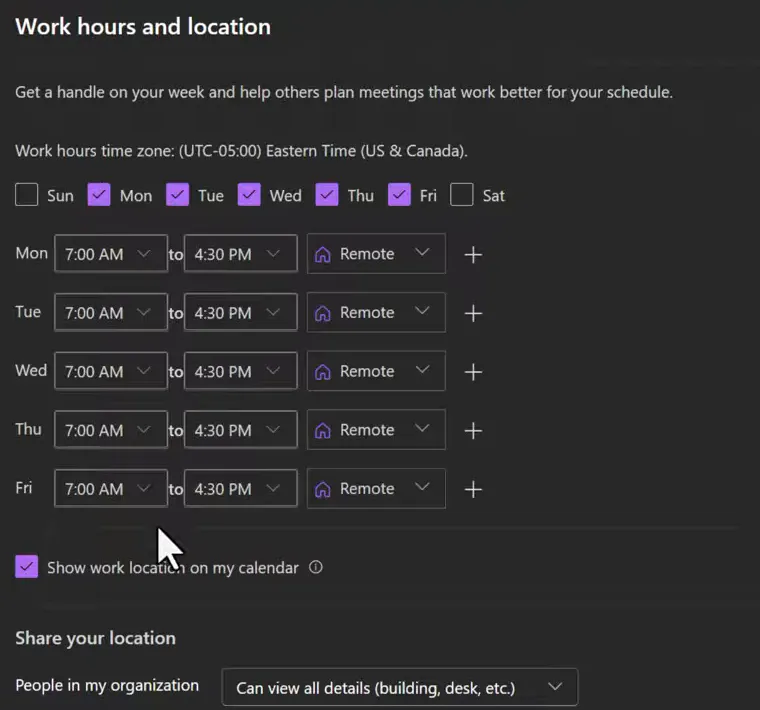
These hours help others plan around you. They don’t stop anyone from booking a meeting outside them.
The settings hold a weekly pattern, so a schedule that alternates, such as every second Friday off, won’t fit. Update individual days from the calendar when your plan changes.
Weather
If your organization allows it, go to Settings > Calendar > Weather. Turn on Show weather, choose Fahrenheit or Celsius, and add your locations.
Add other calendars
Select Add calendar below the small monthly calendar. Your options include:
- Add from directory: open a colleague’s or group’s calendar.
- Subscribe from web or Upload from file: bring in a calendar from elsewhere.
- Holidays: select a country to add its holidays.
- Birthdays: turn on the birthday calendar, if your organization allows it.
- Create blank calendar: keep a separate calendar of your own.
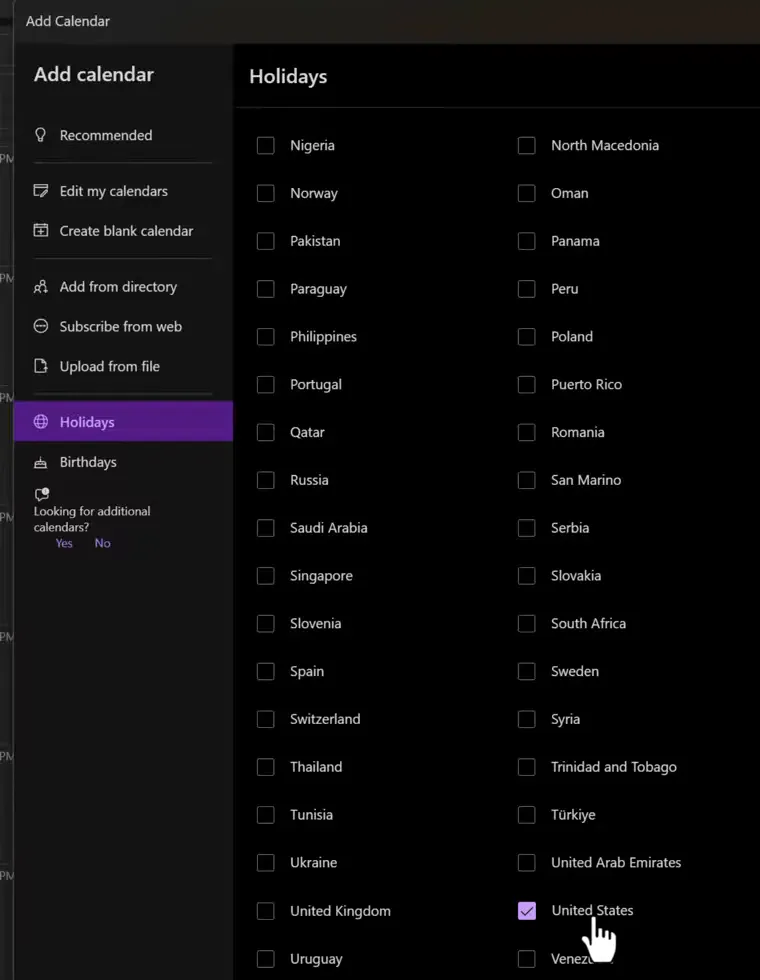
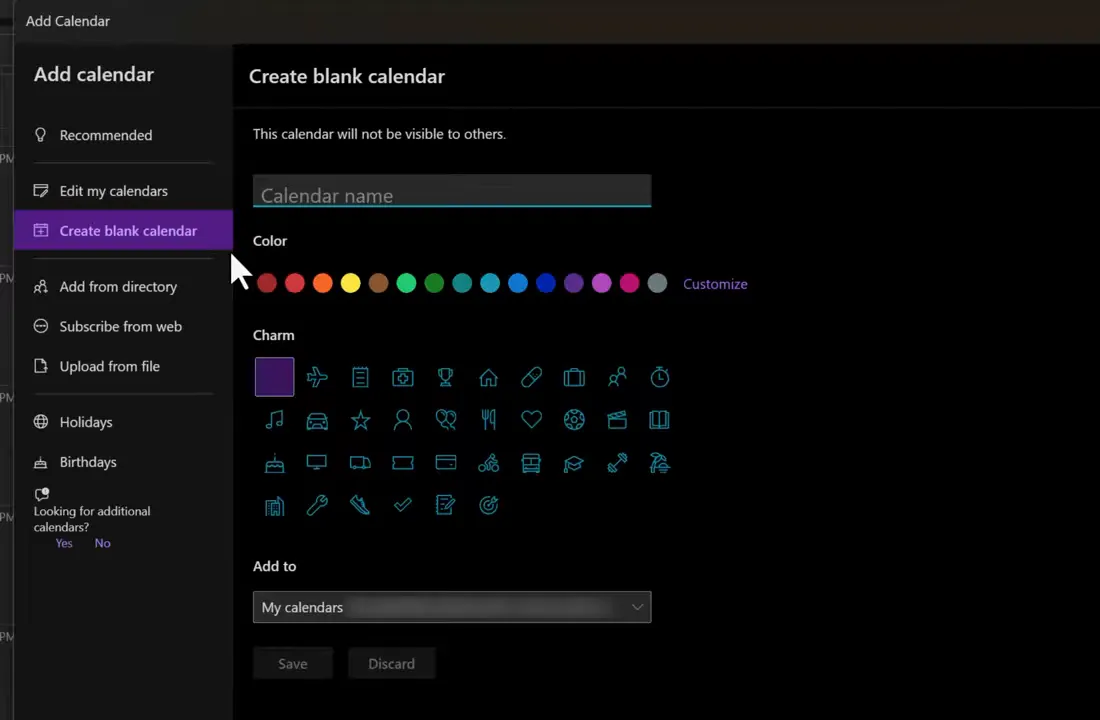
As Outlook notes on that page, a new blank calendar isn’t visible to others, so share it if others need it. It also belongs to your own mailbox. That makes it a weak choice for team information, such as a staff leave calendar, because it depends on one person’s account. Use a shared calendar that belongs to a Microsoft 365 group or team instead.
Troubleshooting
| Symptom | Likely cause | What to do |
|---|---|---|
| An option in this guide is missing | Your account, organization, or cloud doesn’t offer it yet | Check the feature comparison, or ask your administrator |
| Enable classic Outlook style hides a setting | Some settings aren’t available in that style | Turn it off, and check again |
| Search misses a message | The scope is too narrow, or conversations are grouped | Use All folders, include deleted items, or turn off grouping |
| You can’t make the Search Folder you want | New Outlook uses predefined types | Choose the closest type, or use classic Outlook for custom criteria |
| A rule doesn’t run on old mail | Rules act on incoming messages | Select Run rule now |
| A later rule is ignored | Stop processing more rules is on | Clear it, or change the rule order |
| Sweep is missing | You’re in Junk Email, Drafts, Sent Items, or Deleted Items | Go to your inbox, then try again |
| A Sweep choice seems to do nothing yet | Sweep rules run once per day | Check again the next day |
| A recall fails | The recipient uses another email system or an organization that doesn’t allow your recalls, or they read it and your organization doesn’t recall read messages | Check the Message Recall Report for each recipient, and send a correction |
| My Templates isn’t on the ribbon | Add-ins are turned off | Ask your administrator, or use Mail Templates |
Companion video
Video: New Outlook 2026 Tutorial for Beginners | Email, Calendar & Productivity Tips
If the player is blocked on your network, open the video on YouTube.
Need help applying this to your own setup? Read about consulting.